
Friday, 13 December 2013
Tutorial: James
I had a tutorial with James today where I got to show my first creative samples. He seemed impressed with my cubed samples and could see a lot of potential with my subject of working, saying that they are "visually playful". I agreed with him as we both could see them working while placing them upon a body form. On the other hand we also discussed about what I was to make with them, whether I need to make a garment or not. I personally have my mind set on making a garment piece over something adorning, but it is something i have considered and may reconsider on my next project.
Thursday, 12 December 2013
Fabric Cubes
I've been browsing through the pattern magic books looking for some inspiration and techniques for forms within fabric. The first one I wanted to try was to make 'Lumps and Bumps' where they make fabric cubes come out from a flat surface. To make the pattern for this it works like making paper nets. I made mine with three pieces. I had one long piece that was to form the surface and would go up a side over the top and back down. Other two pieces formed the other two side pieces and most of the flat surface. I really liked my little lonely square sticking out of the fabric, I wanted to see if I can multiples side-by-side. I decided 9 square would be the perfect amount so i can see how one that was completely surrounded would act. For this sample it took a lot more planning. As they are so close together I had to use lots of pieces to be able to have seam allowance. This one took fifteen pieces. It took a long time to put together as it was rather complicated trying to stitch four pieces of fabric together in a cross and stitching the straight pieces of fabric around corners. However troublesome it was, it still worked out really well. I think possibly next time as a new sample I could have the cubes more spaced out so i have to use less pieces of fabric. I was also thinking about varying the heights or sizes of the squares. The multiple cube sample is really good when on a shaped surface as the mold really nicely to it by spraying out the cubes in any direction.


Thursday, 5 December 2013
Notched Tucks and Fold Samples
During some time around my work experience I managed to find a couple of hours to think about my creative samples. I revisited some of the previous techniques I had done before. I considered my paper to fabric folds I did in my last project and attempted to redo it to spark some ideas. I was thinking about the lines of tuck I could do, that still relates to my linear imagery for this project. I wanted to retry it but instead putting in notches within the tucks to form shapes in the lines of folds. Putting in small triangle and long trapezoid notches that matched up to form triangles that together look like diagonal diamond pattern. However the quality of the tucks is some what lacking, a problem I've always found when making notched tucks. It's a process I'd not want to be using on my clothing.


Friday, 29 November 2013
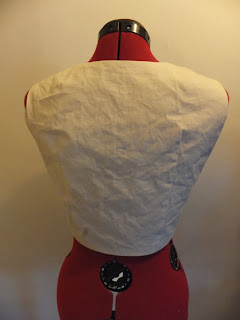
Pattern Drafting: Attempt 5
This week I have been focusing on my final attempt of pattern drafting before I focus more into creative samples. For this I wanted to carry on from my last sample of a lined bodice with the addition of a skirt and to attempt my first application of a zip. I used the same pattern for the bodice but had to draw out a new pattern block for the skirt. I had to adjust the pattern by combining two darts on the back into one and moving the darts to be inline with the darts on the bodice and adjusted the lengths of the waist on the front and back to also make the side seams line up. Once I had the pattern drafted up all I need to do was to use the pieces to see if the matched up nicely and that it wasn't all out of proportion. I had some difficulty putting in the zip as I found stitching it on really difficult on the sewing machine. I think next time I will try to use a zipper foot. Making a dress meant I didn't have to attach the lining to the bottom of the item and hemmed them separately. For my very first attempt at a dress including a zip I think it worked out pretty successfully. My only thought is on the length and style of the skirt but I will leave all of that to the future designing and to now focus on my creative ideas to apply to this base.


Thursday, 28 November 2013
Formative Assessment
During my formative assessment I had to present what work I have done so far in a group crit. For this module I have focused myself on discovering and learning the skills to pattern draft. I hadn't started any creative samples but I did however have a extensive collection of pattern drafting samples for the bodice and the workings of my dress sample. I knew before any feedback that I should start producing creative samples and not focus too much on the technical samples, I was already planning after my dress pattern draft to stop practicing making clothes and work on my creative ideas. I need to look through my research and the pattern magic books and make samples of form, shaping the fabric in a three-dimensional manner.
Monday, 18 November 2013
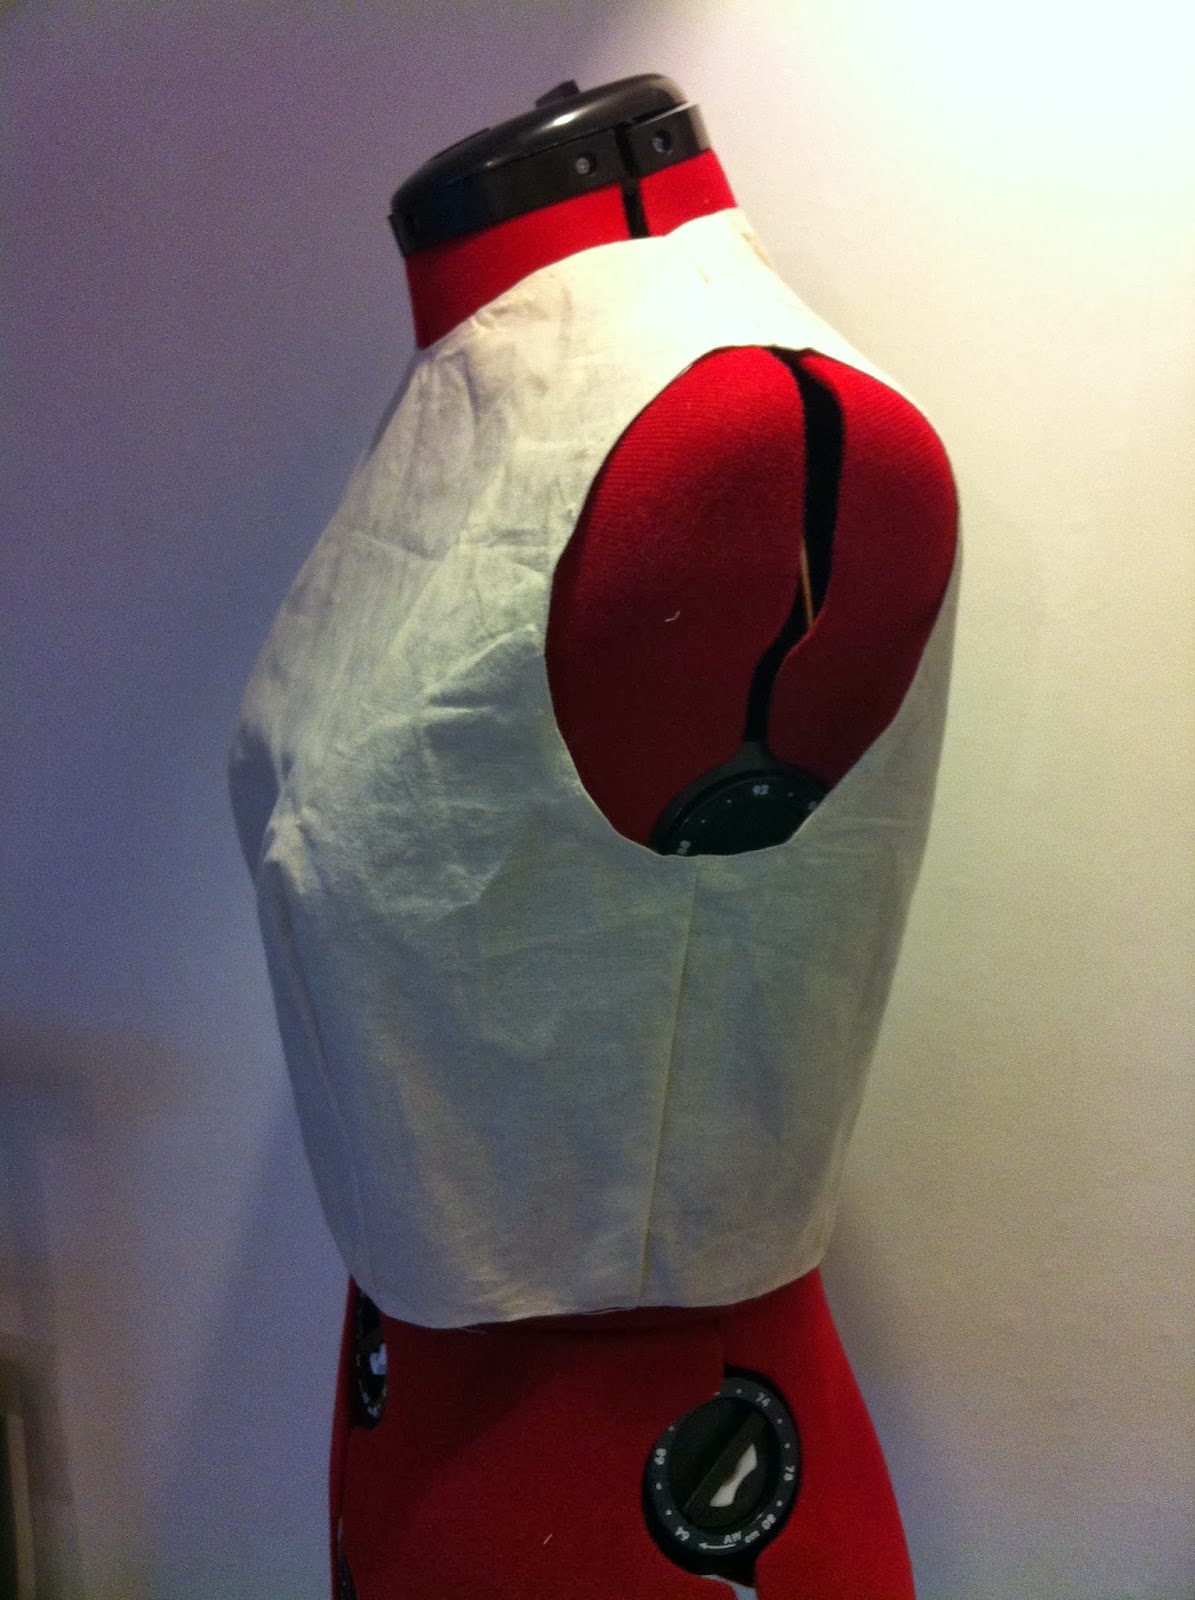
Pattern Drafting Bodice (Attempt 4)
After speaking to Nancy about my last attempt apparently I was doing it wrong I'm to finish the edges after the darts which is why I struggled to get it in line. We talked about how I could finish the edges. I was going to try bias tape to roll over the edges but it was suggested that I might prefer lining the garment. With lining I wouldn't have to deal with all the ends of fabric and darts on the inside as it will all be covered by the lining. I looked online for tutorials on how to line a garment. A lining is like a duplicate of the garment in lining fabric that is then stitch right side to right side around the neck and arm holes to stay in place. I looked at tutorial videos to learn how to stitch the shoulder straps, I had to put the one half of the strap into the other to stitch them together. It took longer for me to make the bodice because of all the bits I had to do for the lining. Usually with a dress the lining would hang down and be turned over and over locked, but with this I stitched around the edges like at the neck and arm holes, pulled it through a small hole and hand stitched the rest. In my next attempt I'm going to make a dress, a skirt addition to the bodice pattern I've been using, in order to try to use the lining properly and to try inputting a zip.


Wednesday, 13 November 2013
Pattern Drafting Bodice (Attempt 3)
I have completed my third attempt of pattern drafting keeping in mind what Nancy had advised me. I rolled over the 1 1/2cm seam allowance twice and stitched them down before stitching the darts and shoulder straps. The edges were flat and there was no puckering of the fabric. However I found rolling the edges first to be difficult to line everything up accurately, especially with the darts. I did some research on garment construction and watched some instructional videos demonstrating the steps to making a garment and I found that finishing the edges was the last job. I will have to revisit Nancy about this and just see what she says as I'm not sure I'm doing it right. I could try rolling it twice after stitching it together. I also found that there were different types of ways of finishing edges and I may have to do some research sampling some to find the best suited for the different parts to my bodice. I did how ever find a way of holding the edges down without pins to stitch them. I pinned the edges and ironed the folds, I then could take the pins out to stitch.


Friday, 8 November 2013
Pattern Drafting Bodice (Attempt 2)
For this week I have been working on my second attempt of pattern drafting a bodice while rectifying the issues I had previously. My main focus was to make the neck line larger to fit your head through. I was able to calculate the measurements that needed taking off by layering on a mannequin an existing garment of sizes and shape I was happy with over my first attempt. From this I could measure the change in size of the neckline. I found it difficult to change the pattern block making process as the shape and size of the armholes and shoulder straps relied on the starting point of the original neckline. After quick evaluation I realized I could keep everything where it was first and change the neckline after drawing the block.
Also on this test I planned to try a larger seam allowance of 2 cm to help me pin and sew the edges over. I found that the after sewing the edges puckered outwards and it wasn't sitting right. I took this problem to Nancy in college to get some guidance on where I was going wrong. She was able to tell me a lot of what I could have found out from just books. she said that I should be fixing the edges before stitching it together. That the seam allowance should be 1 1/2 cm and i could either over-lock and fold over once or fold over twice. This shall be what I try for my next attempt of pattern drafting. As I need to be using a smaller seam allowance I need to find a different method of hold down the fabric while I'm stitching. On my next attempt I will be trying bondaweb as a glue to hold it.
When stitching the piece together I made sure that all the darts were facing inwards. I did some research of darts in a pattern drafting book and it confirmed my theory that the darts are to face inwards on a garment.
I tried stitching in a zip but once I had the zip in place I found that it was a closed zip and that it finished at the smallest point, making it impossible to fit over the body still. I'm unable to get an open ended zip in 7" I will have to extend my bodice into a dress and have a long zip that goes into the skirt.


Tutorial with James
My tutorial with James today pushed me into sourcing some answers to some problems I;m having. I'm having problems with my pattern drafting with finishing the edges and holding it in place with pins to stitch. James has pointed me in the direction of Nancy in seeking help and reminded me that I could use bondaweb as a glue to hold down the edges while I sew. I shown him my drawings and to continue with these and use them as patterns for material samples and structures, as I was planning on doing. He's also referred me to look a Martin Margiela exhibition at Somerset House.
Tuesday, 5 November 2013
Designer Research
As recommended I have focused on researching some fashion designers that I feel relates to the interests of my project. I have collected images from designers that show form, fold and lines within their clothing. More images can be found on my Pinterest. I'm planning on looking into these designers' work even more to find more
I have also looked at designers' collections for S/S 14 and it looks promising that whites and pales colours will be a popular trend as well as fabric pleats. I was mostly impressed with Christian Dior's S/S 14 Ready to Wear show as his work shows a lot of form, pleating and white.


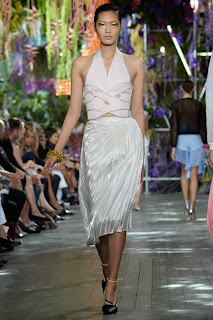
I have also looked at designers' collections for S/S 14 and it looks promising that whites and pales colours will be a popular trend as well as fabric pleats. I was mostly impressed with Christian Dior's S/S 14 Ready to Wear show as his work shows a lot of form, pleating and white.


Donna Karan Channel


Yiqing Yin J.W. Anderson


David Koma Christian Dior S/S 14
Monday, 4 November 2013
Repetition of Lines in Architecture
The last couple of weeks I have been working in my sketchbook. I have collected images of architecture and building details that I can see hidden line of repetition. I have used these picture to draw over to pick out the patterns of the line formations. This indicates the beginning of my ideas and where my interests originate.


Thursday, 31 October 2013
Tutorial with James
My tutorial Today has given me a push for more research but into designers. I need to find the trends and colours of Spring/Summer 14 as this is when my work shall be finished for. I had been planning on doing this but it has made me think about it more and to get me into the mind set of fashion designers. James also mentioned about a maximum of three colours theory. That you should wear no more than 3 colours. I think this is important for when I'm choosing colours. I certainly feel like I like white and pale colours, maybe gradients between the two or even a splash of something bright within the light colours. From looking at last year's S/S trends, pale and white colours were certainly important.
Thursday, 24 October 2013
Tutorial with Mel
Another tutorial with Mel and I have shown great progress already since I last saw her. I've made my first attempt at pattern drafting and I now have a better understanding of the process and how I can adapt it. Once I am fully confident with the making of a bodice I need to revisit my samples from previous work and see how I can combine them. I am also planning on working my way through the Pattern Magic books to assist and create new kinds of forms with the bodice pattern.
Wednesday, 23 October 2013
Pattern Drafting Bodice (Attempt 1) Part 3
I have finished putting together my first attempt of pattern drafting and clothes making. I have stitched the shoulder sections together and stitched the edge over for a clean edge. During making this sample I have found that the neckline is too small to fit your head through. So on my next drafting I will ensure that the hole is bigger to accommodate that. If I was to have the neck line this size I would need to add a way of making it bigger and smaller to take on and off, like a zip or hooks and eyes. I checked the arm holes and they fit nicely. Next time when drafting I will have to consider the placement of where the garment will need to be opened and closed. After examining existing clothing, it will either go on the side or at the top on the back, but because it's not a very flexible fabric the side is probably the best location in order for the waist line to fit over the chest. I also will need to provide more seem allowance around the edging as I struggled with the pins in the sewing machine. I think next time I might like to try fixing the edge better with a over-locker to get a better finish. When stitching the edging and shoulders I didn't arrange for the directions the darts will be pointing on the inside as this effects how the seems look on the outside. I sewn the opposite with inwards and outwards so it looks a bit muddled. I will need to have the darts to point inwards so the front parts are more prominent to the sides. I have learnt so much from this first attempt and it has been really informant on what I will need to do for my next sample.


Monday, 21 October 2013
Pattern Drafting Bodice (Attempt 1) Part 2
Today I have been putting my bodice pattern block to use and testing it works. I've marked out the shape onto calico and cut it out with a centimeter seem allowance for me to stitch it together. I've sewn the darts first to get the shape and tested it on a mannequin to see how it's shaped and whether it fits. The neckline and armholes look a little tight but it fits. My only problem is that if I sew to fully together how will I fit it on to the mannequin again as the the waist of the garment won't fit over the chest. I need to devise a way for it to come undone so I can take it on and off. I'm thinking possibly a zip but I believe they are complicated to apply to clothing. I may have to think of some fast alternatives. This is something that I may need to consider when finishing a garment. Also in future while drafting where I could apply the fixing.


Thursday, 17 October 2013
Pattern Drafting Bodice (Attempt 1)
This week I've been working on my first attempt of pattern drafting. I have been following the steps and measuring out on paper a block for a bodice. I've chosen this as I intend on working on the top half of the body. The book says that it is a block for a size 12 but because I'm only drawing half of the front and back it looks a bit small. I've cut it all out and am going to make it in fabric to see how it fits and whether it works as a pattern.


Thursday, 10 October 2013
Repitition of Lines
Later today I visited the Library again to work on some more research. I started by looking through the latest Vogue magazines to inform myself on what the current fashion trends are and if they'd inform my work. While in the library I came across a couple of artists that had some interesting imagery that I thought to relate to my work. Within in a book Chaos by Josef Koudelka there was an image of a fallen roman pillars in sections with a corrugated effect. The irregular sections of lines was very similar to the types of images I was already looking at. I had also found drawings by Michael Brennand-Wood that interested me because of his use of repeated line patterns.
 |
Josef Koudelka |
Michael Brennand-Wood
Tutorial with Mel
I had my first tutorial this morning with Mel for the beginning thoughts where I shall be leading this project. Mel confirmed my thoughts of starting this project by learning to pattern draft on the top area of the body and then continue my exploration by working through the pattern magic books. In addition I need to find different ways of fixing a fabric form and to test a huge range of fabric so I know for sure that it will hold when I make a piece. I can also work on learning new folding patterns to help me create my own folding variations.
Wednesday, 9 October 2013
Paper Manipulation Research
As I know that I want to continue with a similar subject I revisited my previous 50 images to find related sources to the work that I'm going to be undertaking. Today I visited the library to search through the paper craft books to find some examples of artists that use continuous folding techniques to form shapes or items for the body. Artists like Richard Sweeney, Andrea Russo and Polly Verity are good examples of impressive folding patterns. I still have to research fashion designers for existing clothing displaying signs folds and linear lines. I know that Issey Miyeke is a good example of this as he uses the same process as me to creating folds and fixing them with heat.


Richard Sweeney

Andrea Russo

Polly Verity
Monday, 7 October 2013
A New Year, A New Project
This term I would like to continue on from my previous work to advance in my interest of fabric manipulation with folding and stitching and applying it to the body, making wearable pieces.
Over the summer I have looked at how I could improve and fix any issues I had. On my final piece I had problems keeping the folded structures strong and crisp. I have learnt that the fabric I was using was not suitable for the process I was undertaking and fabric manipulation works better with stitch as a fixative than with shibori techniques, especially when there is a weight to it.
Looking at the work of Alexa Liss I found that I could continue using my folding patterns but when applying it to the body I keep its form by stitching it to a base fabric, like a bodice. From this I knew that I would need to teach myself how to pattern draft to be able to make clothing and to better understand the shape of the body. While looking for books on pattern drafting I came across a series of pattern books called Pattern Magic that specializes on pattern drafting clothes with unusual shapes and forms added to them.


Alexa Liss
Monday, 3 June 2013
Constructing The Final Piece
My skirt and arm pieces are tube shaped to go around the arms and waist. I worked out that I'd be making my pieces in panels and stitching them together to make the wrap. I constructed my arm pieces and skirt in a similar process. I started by constructing the panels of fold and tucks separately. Before I could start putting them together I had to stitch lines of yellow down the folded pieces. Once I had all the components ready I had to begin putting it together. I pinned the folds into place and stitched them into a long line. When all together I used the over locker to finish the edge. My biggest concern was at this point where I wasn't sure how they were going to fix to the body. For the skirt I was thinking of just stitching the top to a long band of elastic but I thought it would look a bit naff. It was suggested that I make it fitted with a strip of fabric up the top and buttons to fix but I thought that was complicated to apply my folds to a straight edge at the top. It did inspire my idea to have a tube like fabric strip that would be fixed to the top with the folds out flat but in the tube I would have my band of elastic which would pull my folds back into their form. This was a great idea as the elactic in the band would scrunch the fabric tube into lines that I looked at previously with my stitching with elastic thread I did earlier in the project. For the arm bands however I stuck to using straight off elastic but I stitched on the inside to the lines in the folds so that the stitching wouldn't flatten out the folds. Once I had all the panels together and the fixing elastic in place I stitched the ends together to make the tubes and finishing the pieces.
I really like how my arm bands turned out and they are probably my favorite out the two pieces. I was a little let down by the look of my skirt at the end as through the process of making the folds didn't really hold in too well and lost some of their strength. That is probably a material problem or that the weight of the fabric was too much to hold. I know now for next time that I'd need to test out different fabrics in larger samples to see their strength.


I really like how my arm bands turned out and they are probably my favorite out the two pieces. I was a little let down by the look of my skirt at the end as through the process of making the folds didn't really hold in too well and lost some of their strength. That is probably a material problem or that the weight of the fabric was too much to hold. I know now for next time that I'd need to test out different fabrics in larger samples to see their strength.


Monday, 27 May 2013
Final Piece Idea Generating
I've been trying to figure out what to make using my folded forms. I know I want me make something wearable but I need to work out what it is, where it's going to be and how will it sit. I've been trying to draw some things but the best way to do it is to use my samples to place them upon a body form to see how they work. I've also used a bigger sheet of a paper form to test more outrageous ideas. The difference between the paper and fabric is that the paper is more strict to it's form and doesn't have as much give to moving. So I know that the fabric won't sit into some of the lovely structures that the paper produces. I have decided from playing with the shapes to make a skirt and arm bands both incorporating the tuck lines along with the folds.


Subscribe to:
Posts (Atom)