
Showing posts with label Fabric Manipulation. Show all posts
Showing posts with label Fabric Manipulation. Show all posts
Saturday, 18 January 2014
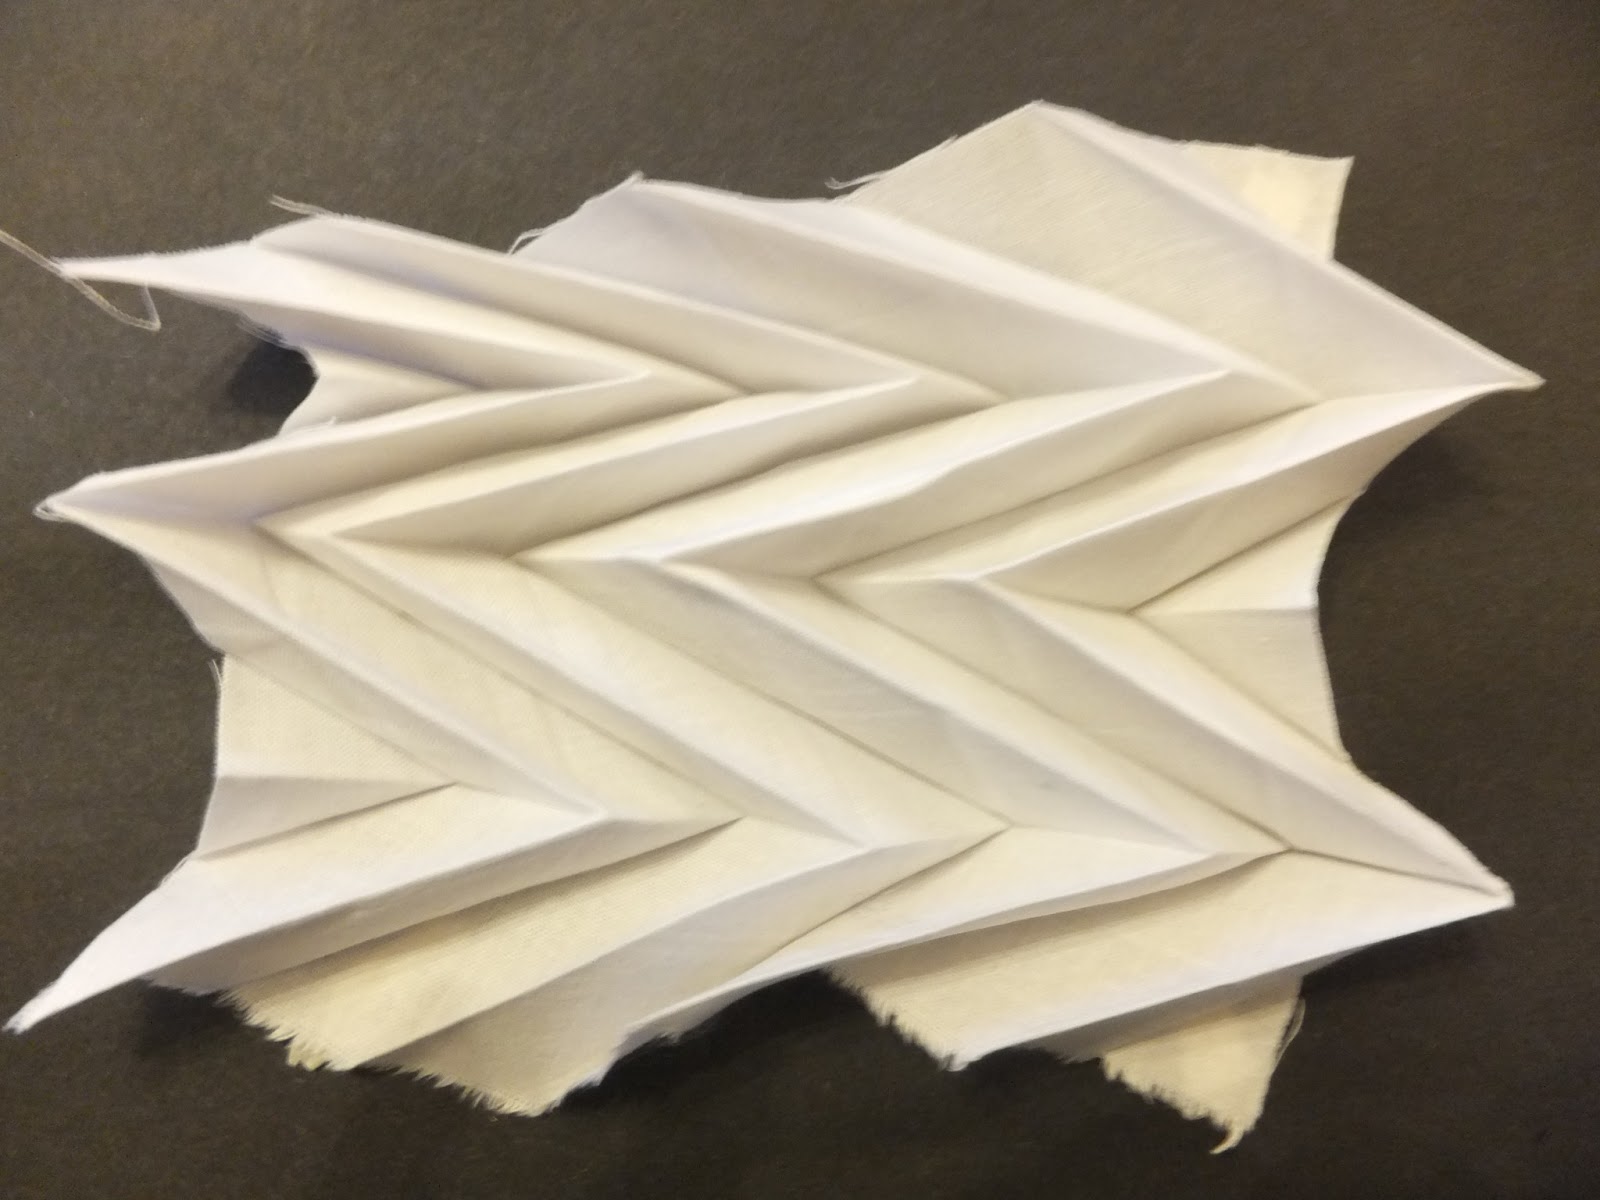
Sprout Waves
I have arranged to half of each sprout oppositely in three channels to make a wave with the folds. I flipped round some sprouts and moved them over to be diagonally crossing in the same direction. I find this piece rather interesting but I don't see it on the body, I do however could see it with multiples of folds and as a wall piece or framed. I may reconsider with it on the body but with not as many, possibly just a chain of two waves.
Friday, 17 January 2014
Multiple Angled 'Sprout'
Today I carried on from my 'Spouting' sample where I had changed the angle and made a new sample with the same technique but this time I've created a line of multiple. I'm really fond of this technique and the way it looks when it curves and bends. I've been looking at current trends and strong geometric folds are very popular right now in S/S14 collections. These types of samples are are going to fit in really nicely.


Friday, 10 January 2014
Sample Placement Ideas
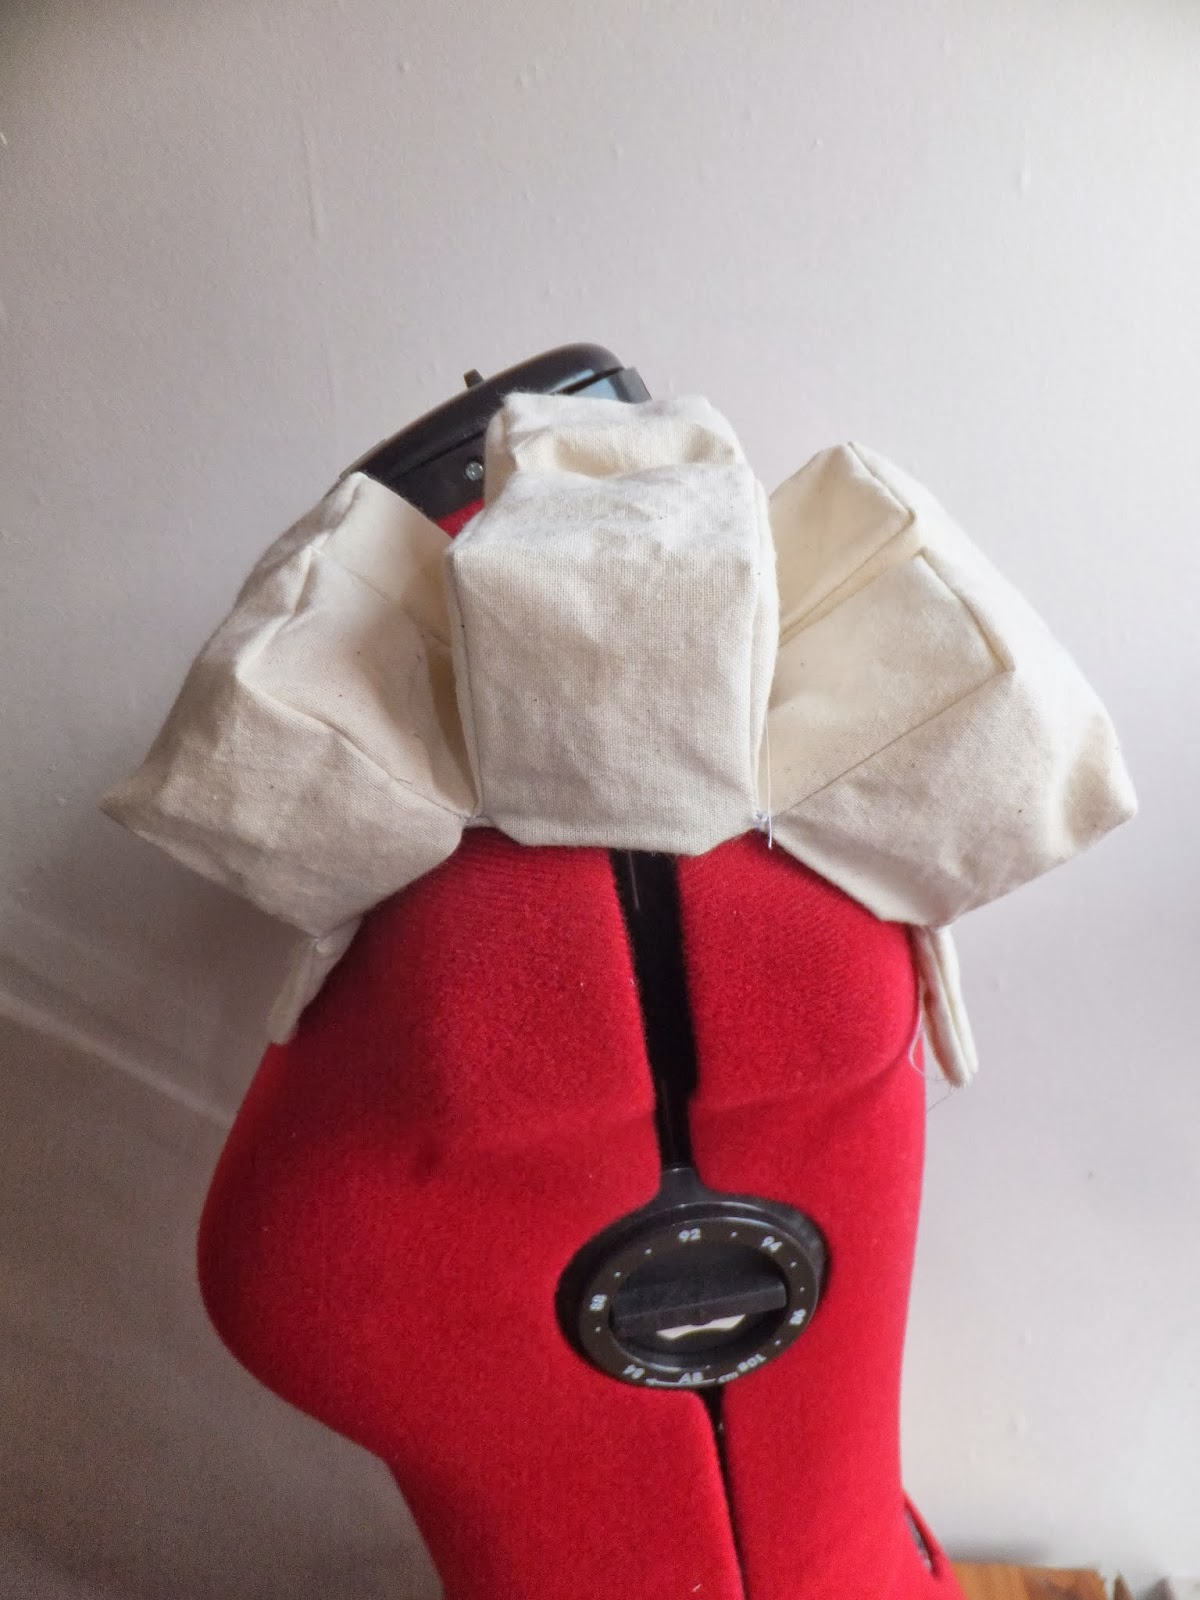
I spent all day working with my samples, placing them in different positions on my mannequin and documenting each idea I had for where my fabric shapes could be placed. I came up of all sorts of variation and different places. I found myself in the end mostly interested in placing things on the shoulders or hips. These are a select few of the images I made with them.


Thursday, 9 January 2014
Angle Change on 'Spouting' Sample
Today I followed on from my 'Sprouting' samples. I reworked the pattern and changed the angle that the fold comes out. It comes out to more of a point this time. I'm rather fond of this sample, and again I want to create a line of multiples of this to see how they sit together.


Wednesday, 8 January 2014
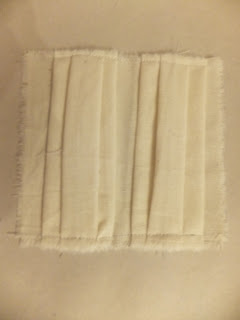
Revised and Diagonal Tucks
I wanted to revisit my previous work of tucks and again create multiples all straight and uniform. This time when I made the tucks I didn't sew each fold, I folded it first and then sewn a line of straight flat fabric along the folded edge to keep the folds secure. Inspired by my 'Sprouting' samples I wanted to try two lots of tucks diagonally coming together into a point. I was interested by how it would form and whether it was possible to put two lots of tucks together. I was very impressed with how they came out its worked very nicely.


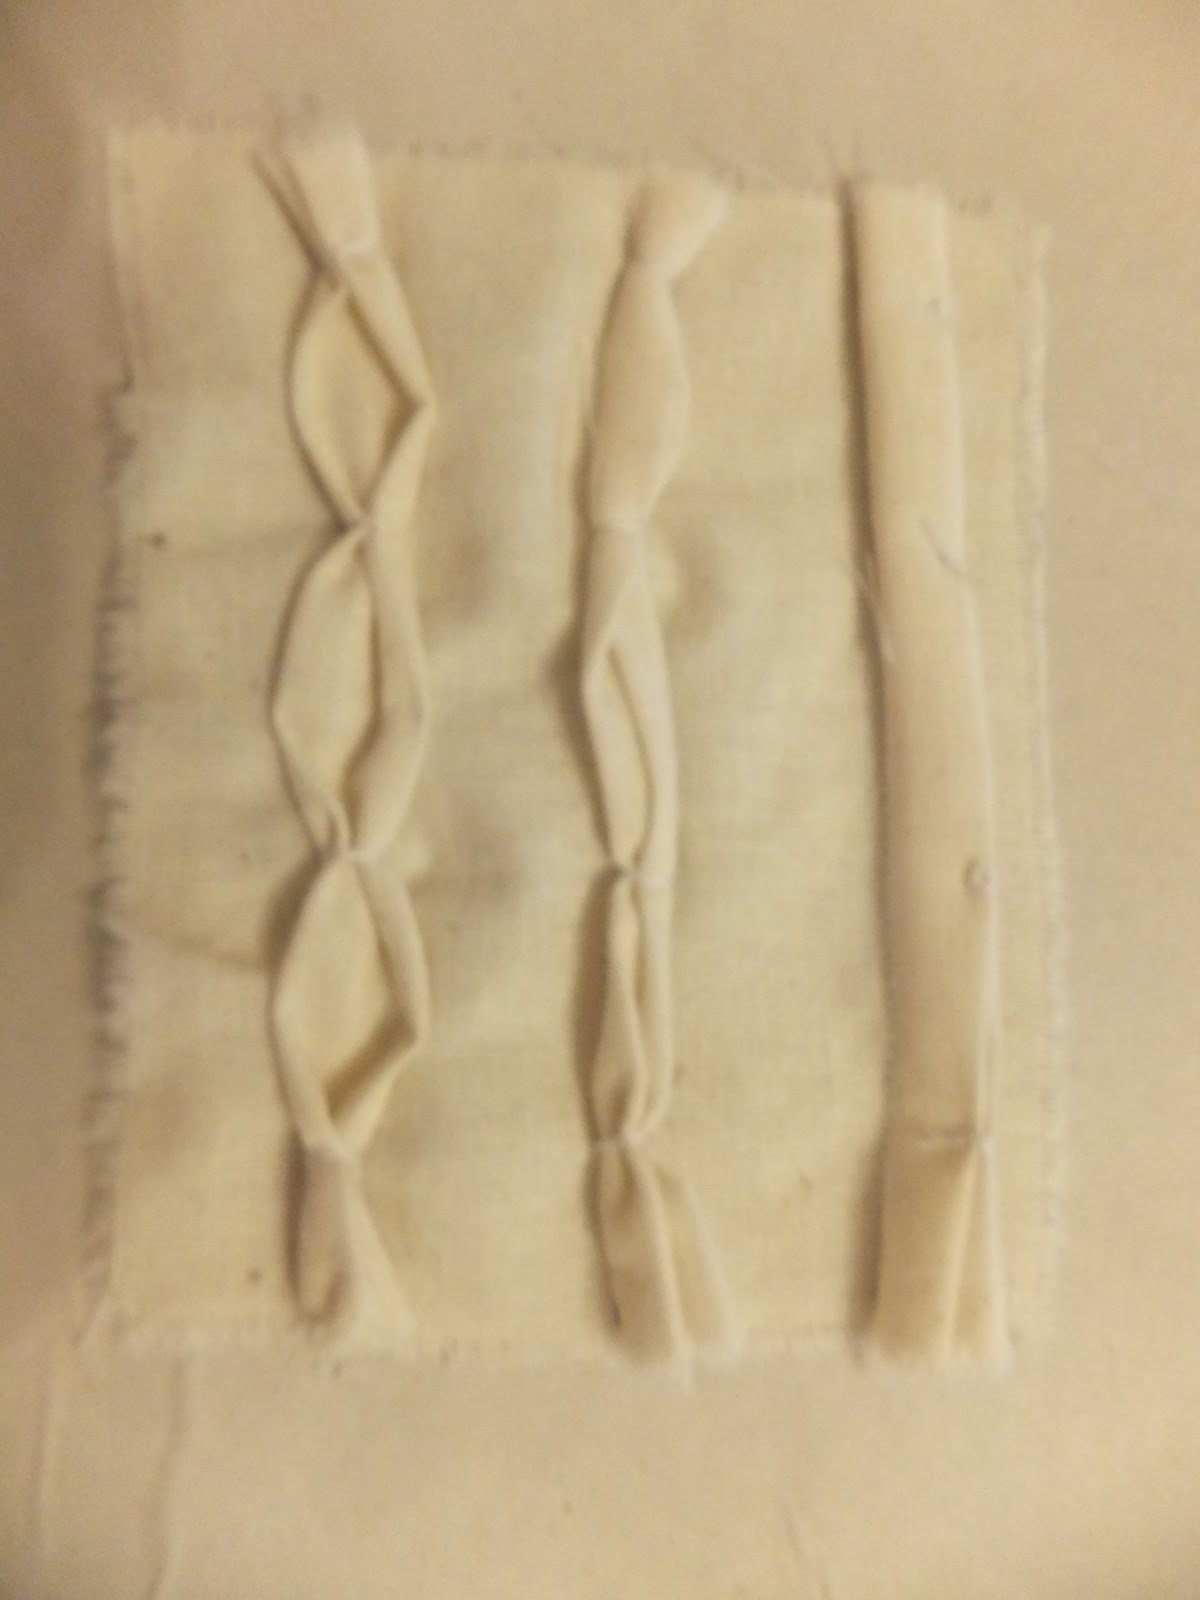
Sprouting Samples
Today I have been working on a new type of sample, moving away from the fabric cubes. Looking through the pattern magic books again I found a style they called 'Sprouting' or 'Nyokitto'. From looking at the images it didn't look like much. I just looked like extra fabric hanging from the body. However when I tried it for myself I was quite surprised and excited by what I had made. Using only two pieces of material I made fold that grows out of the flat fabric. From this one sample I needed to try multiples in a row, I knew that it was going to work so well together with multiple lines of folds. It was much more difficult to make a multiple line as the pattern curves round in a circle with too many of the folds. I think 5 or 6 would be the most I could do without the pattern going over itself. I could probably rectify this if i wanted more by cutting the pattern into pieces and having seams on the insides of the folds to be hidden. I want to play with this some more, move the folds around see how the fit together with other folds in different positions and change sizes and lengths.


Thursday, 12 December 2013
Fabric Cubes
I've been browsing through the pattern magic books looking for some inspiration and techniques for forms within fabric. The first one I wanted to try was to make 'Lumps and Bumps' where they make fabric cubes come out from a flat surface. To make the pattern for this it works like making paper nets. I made mine with three pieces. I had one long piece that was to form the surface and would go up a side over the top and back down. Other two pieces formed the other two side pieces and most of the flat surface. I really liked my little lonely square sticking out of the fabric, I wanted to see if I can multiples side-by-side. I decided 9 square would be the perfect amount so i can see how one that was completely surrounded would act. For this sample it took a lot more planning. As they are so close together I had to use lots of pieces to be able to have seam allowance. This one took fifteen pieces. It took a long time to put together as it was rather complicated trying to stitch four pieces of fabric together in a cross and stitching the straight pieces of fabric around corners. However troublesome it was, it still worked out really well. I think possibly next time as a new sample I could have the cubes more spaced out so i have to use less pieces of fabric. I was also thinking about varying the heights or sizes of the squares. The multiple cube sample is really good when on a shaped surface as the mold really nicely to it by spraying out the cubes in any direction.


Monday, 3 June 2013
Constructing The Final Piece
My skirt and arm pieces are tube shaped to go around the arms and waist. I worked out that I'd be making my pieces in panels and stitching them together to make the wrap. I constructed my arm pieces and skirt in a similar process. I started by constructing the panels of fold and tucks separately. Before I could start putting them together I had to stitch lines of yellow down the folded pieces. Once I had all the components ready I had to begin putting it together. I pinned the folds into place and stitched them into a long line. When all together I used the over locker to finish the edge. My biggest concern was at this point where I wasn't sure how they were going to fix to the body. For the skirt I was thinking of just stitching the top to a long band of elastic but I thought it would look a bit naff. It was suggested that I make it fitted with a strip of fabric up the top and buttons to fix but I thought that was complicated to apply my folds to a straight edge at the top. It did inspire my idea to have a tube like fabric strip that would be fixed to the top with the folds out flat but in the tube I would have my band of elastic which would pull my folds back into their form. This was a great idea as the elactic in the band would scrunch the fabric tube into lines that I looked at previously with my stitching with elastic thread I did earlier in the project. For the arm bands however I stuck to using straight off elastic but I stitched on the inside to the lines in the folds so that the stitching wouldn't flatten out the folds. Once I had all the panels together and the fixing elastic in place I stitched the ends together to make the tubes and finishing the pieces.
I really like how my arm bands turned out and they are probably my favorite out the two pieces. I was a little let down by the look of my skirt at the end as through the process of making the folds didn't really hold in too well and lost some of their strength. That is probably a material problem or that the weight of the fabric was too much to hold. I know now for next time that I'd need to test out different fabrics in larger samples to see their strength.


I really like how my arm bands turned out and they are probably my favorite out the two pieces. I was a little let down by the look of my skirt at the end as through the process of making the folds didn't really hold in too well and lost some of their strength. That is probably a material problem or that the weight of the fabric was too much to hold. I know now for next time that I'd need to test out different fabrics in larger samples to see their strength.


Monday, 27 May 2013
Final Piece Idea Generating
I've been trying to figure out what to make using my folded forms. I know I want me make something wearable but I need to work out what it is, where it's going to be and how will it sit. I've been trying to draw some things but the best way to do it is to use my samples to place them upon a body form to see how they work. I've also used a bigger sheet of a paper form to test more outrageous ideas. The difference between the paper and fabric is that the paper is more strict to it's form and doesn't have as much give to moving. So I know that the fabric won't sit into some of the lovely structures that the paper produces. I have decided from playing with the shapes to make a skirt and arm bands both incorporating the tuck lines along with the folds.


Friday, 22 March 2013
Fixing Folds
The starch spray I had been using only held temporarily and gave the fabric a slight orange twinge so I've had to stop using it. I have worked out that I don't need to spray my fabric with the starch before forming. I can sandwich it between the two folded paper and put it in the heat press and that still makes the form. I have been testing fixing my folds so that it's a more permanent fixture. I've taken on the process of shibori by putting my fabric folds in a steamer for 10 minutes. I've had a challenge with putting them in the steamer. I need to have something on the fabric to hold the fold while its in the steaming process. I thought that I could sandwich it like I do when putting it into the heat press but the paper will ruin. I thought With acetate but then I was worried that the steam wont be able to actually effect the fabric. As I have been testing ideas with the folds I have also been exploring various ways I can keep it together. I've used pins and stitches but they left holes in the fabric. I've used paper clips but they left dent marks in the fabric where they sat. The last thing I tried was wrapping the fold with thread loosely which seemed to work well and not make any marks in the fabric.


Thursday, 14 March 2013
Dyed Folded Fabric Pt.2
I carried on with dyeing my folded fabrics but this time I coloured the fabric yellow first and then dyed the folded piece with blue making it green but darker on the edges. This was much different than I expected as I thought the inside would be yellow and the outside areas would be blue or green.


Dyed Folded Fabrics
I have been feeling a bit stuck yet again so to try to overcome this I have been in the workshop to expend on my folded fabrics for what else I can do with them. I have attempted a new process of making them by sandwiching the fabric between folded paper and then pressing it. This has made it so much more easier and faster than before. My only ponder is how thick can I have stuff in the heat press, if not very much then I wont be able to make very wide pieces. I was able to make three folded samples in the morning and after lunch I made up some procion dyes to try dip dying them. When I get the folded samples wet it washes the starch off and it loses its form. So to stop this I have to pin them and starch them after they are dry and press them again. I'm thinking of trying to steam them into their form like shibori. When they are pinned together the dye only effects the outside areas and leaves white sections inside. I made one completely blue, one white with blue edges and a yellow one I am going to do blue edges tomorrow morning. I quite liked the blue colour with the folds, I might want to try a more grey colour. I still want to try different processes with the folds to see what I can create.


Thursday, 7 March 2013
Folded Fabric
Today I've been busy in the textiles workshop testing folding and forming fabrics with starch spray. I tried a few different types of fabrics to find out which materials work best. Cotton is too thick and isn't as malleable or and silk organza has a loose weave and doesn't hold a fold It very well. The silk habati worked best as its a finer fabric so it bends while also holding the folded pattern. The process to fold the fabric took a very long time as it wasn't as easy to hold its shape unlike paper until it went under the heat press. I still want to try a moldable polyester fabric and I was also going to try a fabric with stabilizer on it. I'm really impressed with how the folded fabrics have turned out. I'd like to possibly try with the addition of print or stitch. I also want to try dying it when it's folded up to see what effect I'd get. I'm assuming it will look like a geometric tie-dye. I was recommended to look at the work of Angharad McLaren, a weaver that also forms her weaved pieces with folds similar to the ones I'm using.


Cotton

Silk Organza

Silk Habati

Angharad McLaren
Thursday, 24 January 2013
3DSP Samples Fabric Manipulation
My last chance to finish off my fabric manipulation samples in late night with Rich. I finished off a couple of tucks (Contoured and Slashed) that I didn't have time for Monday. In addition to this I also created some other folded fabric textures: Interlocked Square, Prairie Points and Bias Strip Boarders. I tried a few different types of Bias strips looking at different sizes and ways to use them.


Monday, 21 January 2013
3DSP - Tuck Samples
With the textiles workshop being closed all day I've borrowed a sewing machine and taken it into the metals workshop with rich. I have been focusing on churning out fabric manipulation samples. Carrying on from tucks I've been researching the many different types of tucks and have put that into practice by creating a whole range for my 3DSP. In this time I looked at Pin, blind, centered, double centered, tapered, Shell, Cross-Stitched and Cross-tacked tucks. I managed to make a big impact into my samples collection today making around 7/8 samples. I basically aimed to cover all the areas of tucks before moving on, attempting to cover the grounds as its getting close to the deadline soon.


Thursday, 17 January 2013
3DSP - Fabric Manipulation - Tucks
Today was a 3DSP day. This day I worked solidly on making samples. I've kinda lost my way with my quilting samples as I'm struggling for ideas but I have moved on to fabric manipulation for the mean time. I went through the Creative Tucks and Textures for Quilts and Embroidery book I got from the library which is so much easier to understand than the Fabric Manipulation book as it explains it better and has better diagrams. I started simply with basic tucks and played with the twisting of tucks to make interesting three-dimensional shapes with them. After that I then learnt about crossed over tucks and played with changes of them. And finally I created a few samples of fabric additions you can add to pieces give variations and decoration. I made 15 samples today, I'm so proud of the amount of impact that has added to my 3DSP samples.


Subscribe to:
Posts (Atom)