
Thursday, 31 October 2013
Tutorial with James
My tutorial Today has given me a push for more research but into designers. I need to find the trends and colours of Spring/Summer 14 as this is when my work shall be finished for. I had been planning on doing this but it has made me think about it more and to get me into the mind set of fashion designers. James also mentioned about a maximum of three colours theory. That you should wear no more than 3 colours. I think this is important for when I'm choosing colours. I certainly feel like I like white and pale colours, maybe gradients between the two or even a splash of something bright within the light colours. From looking at last year's S/S trends, pale and white colours were certainly important.
Thursday, 24 October 2013
Tutorial with Mel
Another tutorial with Mel and I have shown great progress already since I last saw her. I've made my first attempt at pattern drafting and I now have a better understanding of the process and how I can adapt it. Once I am fully confident with the making of a bodice I need to revisit my samples from previous work and see how I can combine them. I am also planning on working my way through the Pattern Magic books to assist and create new kinds of forms with the bodice pattern.
Wednesday, 23 October 2013
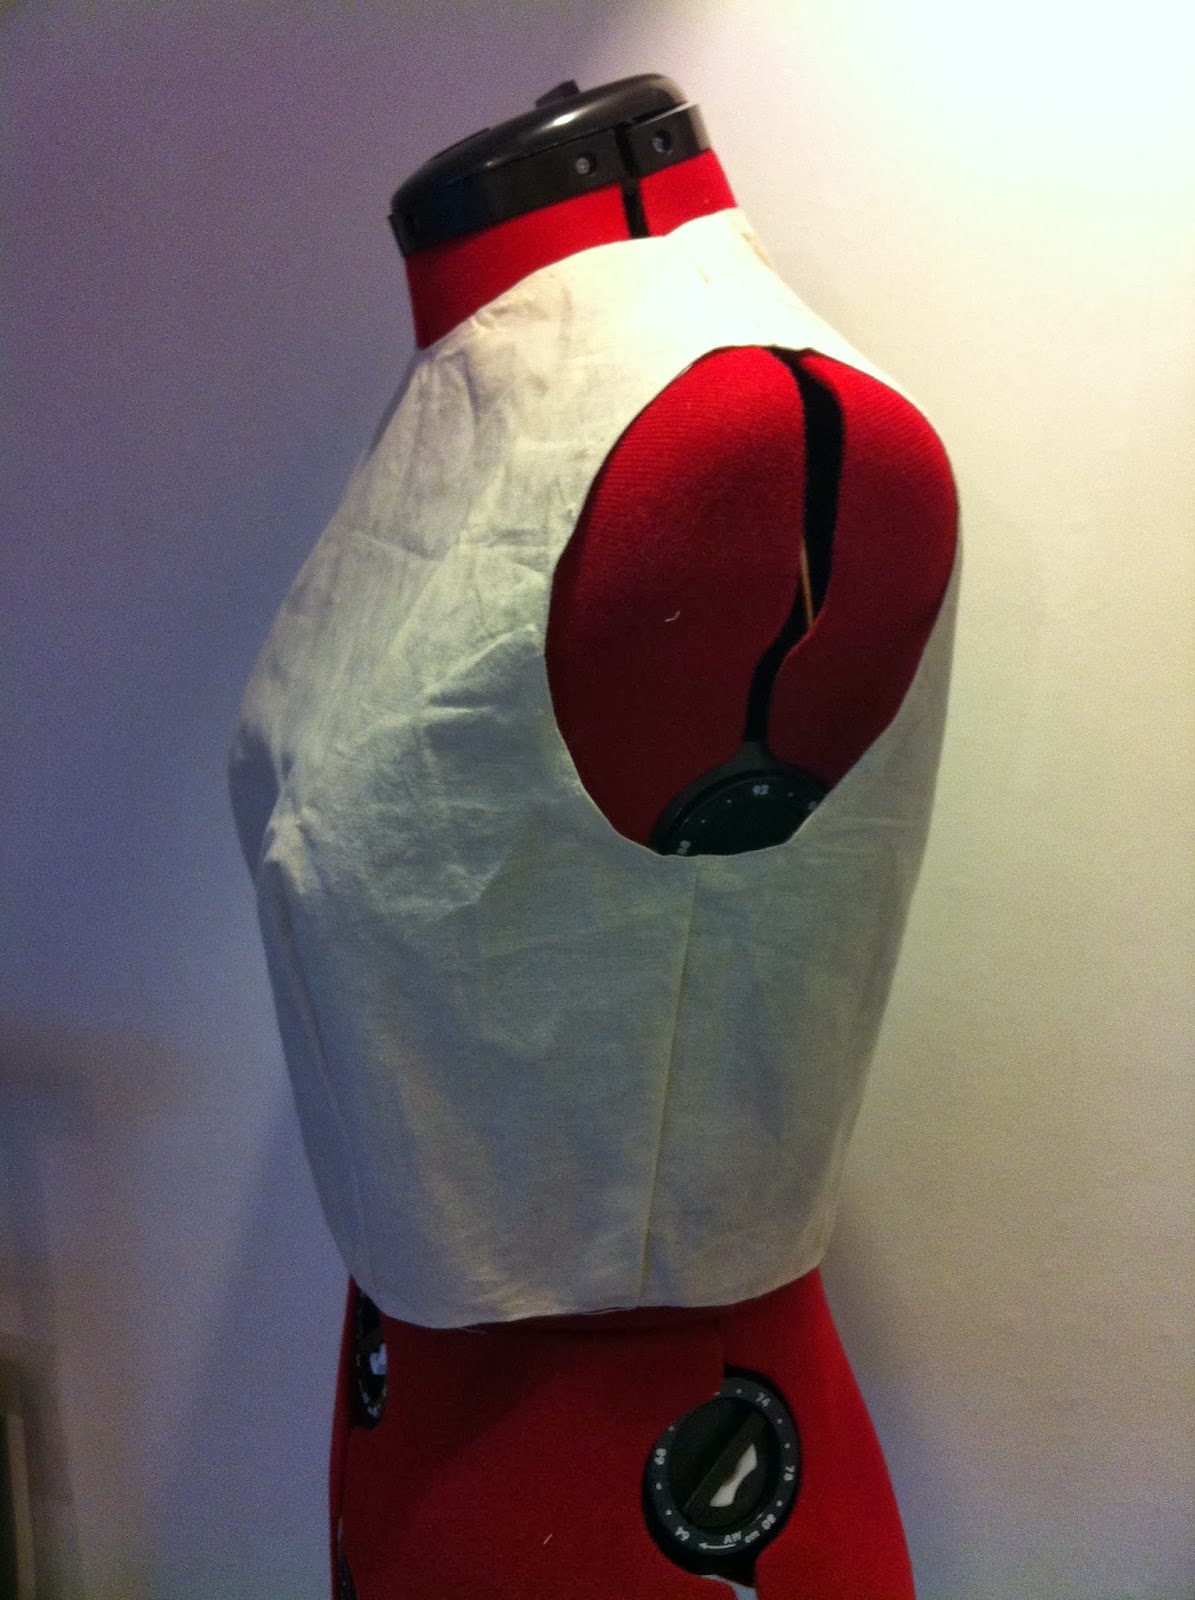
Pattern Drafting Bodice (Attempt 1) Part 3
I have finished putting together my first attempt of pattern drafting and clothes making. I have stitched the shoulder sections together and stitched the edge over for a clean edge. During making this sample I have found that the neckline is too small to fit your head through. So on my next drafting I will ensure that the hole is bigger to accommodate that. If I was to have the neck line this size I would need to add a way of making it bigger and smaller to take on and off, like a zip or hooks and eyes. I checked the arm holes and they fit nicely. Next time when drafting I will have to consider the placement of where the garment will need to be opened and closed. After examining existing clothing, it will either go on the side or at the top on the back, but because it's not a very flexible fabric the side is probably the best location in order for the waist line to fit over the chest. I also will need to provide more seem allowance around the edging as I struggled with the pins in the sewing machine. I think next time I might like to try fixing the edge better with a over-locker to get a better finish. When stitching the edging and shoulders I didn't arrange for the directions the darts will be pointing on the inside as this effects how the seems look on the outside. I sewn the opposite with inwards and outwards so it looks a bit muddled. I will need to have the darts to point inwards so the front parts are more prominent to the sides. I have learnt so much from this first attempt and it has been really informant on what I will need to do for my next sample.


Monday, 21 October 2013
Pattern Drafting Bodice (Attempt 1) Part 2
Today I have been putting my bodice pattern block to use and testing it works. I've marked out the shape onto calico and cut it out with a centimeter seem allowance for me to stitch it together. I've sewn the darts first to get the shape and tested it on a mannequin to see how it's shaped and whether it fits. The neckline and armholes look a little tight but it fits. My only problem is that if I sew to fully together how will I fit it on to the mannequin again as the the waist of the garment won't fit over the chest. I need to devise a way for it to come undone so I can take it on and off. I'm thinking possibly a zip but I believe they are complicated to apply to clothing. I may have to think of some fast alternatives. This is something that I may need to consider when finishing a garment. Also in future while drafting where I could apply the fixing.


Thursday, 17 October 2013
Pattern Drafting Bodice (Attempt 1)
This week I've been working on my first attempt of pattern drafting. I have been following the steps and measuring out on paper a block for a bodice. I've chosen this as I intend on working on the top half of the body. The book says that it is a block for a size 12 but because I'm only drawing half of the front and back it looks a bit small. I've cut it all out and am going to make it in fabric to see how it fits and whether it works as a pattern.


Thursday, 10 October 2013
Repitition of Lines
Later today I visited the Library again to work on some more research. I started by looking through the latest Vogue magazines to inform myself on what the current fashion trends are and if they'd inform my work. While in the library I came across a couple of artists that had some interesting imagery that I thought to relate to my work. Within in a book Chaos by Josef Koudelka there was an image of a fallen roman pillars in sections with a corrugated effect. The irregular sections of lines was very similar to the types of images I was already looking at. I had also found drawings by Michael Brennand-Wood that interested me because of his use of repeated line patterns.
 |
Josef Koudelka |
Michael Brennand-Wood
Tutorial with Mel
I had my first tutorial this morning with Mel for the beginning thoughts where I shall be leading this project. Mel confirmed my thoughts of starting this project by learning to pattern draft on the top area of the body and then continue my exploration by working through the pattern magic books. In addition I need to find different ways of fixing a fabric form and to test a huge range of fabric so I know for sure that it will hold when I make a piece. I can also work on learning new folding patterns to help me create my own folding variations.
Wednesday, 9 October 2013
Paper Manipulation Research
As I know that I want to continue with a similar subject I revisited my previous 50 images to find related sources to the work that I'm going to be undertaking. Today I visited the library to search through the paper craft books to find some examples of artists that use continuous folding techniques to form shapes or items for the body. Artists like Richard Sweeney, Andrea Russo and Polly Verity are good examples of impressive folding patterns. I still have to research fashion designers for existing clothing displaying signs folds and linear lines. I know that Issey Miyeke is a good example of this as he uses the same process as me to creating folds and fixing them with heat.


Richard Sweeney

Andrea Russo

Polly Verity
Monday, 7 October 2013
A New Year, A New Project
This term I would like to continue on from my previous work to advance in my interest of fabric manipulation with folding and stitching and applying it to the body, making wearable pieces.
Over the summer I have looked at how I could improve and fix any issues I had. On my final piece I had problems keeping the folded structures strong and crisp. I have learnt that the fabric I was using was not suitable for the process I was undertaking and fabric manipulation works better with stitch as a fixative than with shibori techniques, especially when there is a weight to it.
Looking at the work of Alexa Liss I found that I could continue using my folding patterns but when applying it to the body I keep its form by stitching it to a base fabric, like a bodice. From this I knew that I would need to teach myself how to pattern draft to be able to make clothing and to better understand the shape of the body. While looking for books on pattern drafting I came across a series of pattern books called Pattern Magic that specializes on pattern drafting clothes with unusual shapes and forms added to them.


Alexa Liss
Subscribe to:
Posts (Atom)