

Monday, 27 June 2011
Summary
My final installation follows my proposal fairly closely as i've tried to stick to my origanal plan and work around any problems I was faced with. I always planned to have a bedroom piece in the same style as "My Bed" by Tracy Emin, but to extend this with a physical representation of the dreams and distress around the room. I feel that the paper lace has come together to show this really well as its many loops and twists, along with all the the intricate detail within the chains themselves showed the complex nature of dreams. I also think that the quilt has come together well, each patch showing a different person sleeping with different dreams in each patch. This shows the variety of dreams and how each dream is individual even with some similarities. The floor piece was not in my proposal as I added this idea later on when I was planning my installation, follwing on from the lace patterns I had been using throughout the design of the room. The floor piece is not as clear as I had hoped in my original idea however I think the faded patterns do give more a dream like feel. I also think the way all of the designs are linked with the use of lace helps to bring it all together and show that its somewhere between being awake and being asleep. The film has been a challenge although I think it has turned out well, I like the way the tv in the corner of the room integrates the film into the dream like state of the room, by showing a few dream sequences and the music behind them it is part of the not quite sleeping and not quite awake theme of them room.
![]()
Sunday, 26 June 2011
Floor Dust Pattern
Once i had starting planning out my installation I decided that it would be a good idea to do a floor piece to accompany the room. It was Catherine Bertola that inspirsed me to work on the floor, as she had done a number of dust patterns which i thought could be used aswell to represent dreams within the room. I decided that I wanted to continue the lace theme that has run through the rest of the piece linking all aspects together. I had a rough idea of how i could create a pattern with the lace and I had a temporary fabric adhesive that I knew would not be too hard to clean up, but would be sticky enough to create the pattern. My method of creating this pattern was to place the lace on the floor where i wanted the pattern, sprayed the adhesive over the top of the lace, removing the lace and then spreading the "dust" across the space.
![]()
I had to do some tests to find out what kind of "dust" I was going to use. I tested flour and baby powder, I found that as the baby powder was easier to spread and stuck better to the floor. I also noticed that the adheasive wasn't particularly resistant to brush strokes and this began to bring the pattern up when i was spreading the powder around. I resolved this by using a brush with more fine bristles, a make up brush worked well. I also noticed that the thicker the layer of spray adhesive meant that a thicker layer of powder stuck, which made the pattern easier to see. I made note of this so that i knew to get a good layer of adhesive down during the real piece. I also decided to test how the tests lasted when left over time, I left the test on the floor for a few days to see how it had faded. This showed that the pattern wouldn't fade over time which was good as it had to last a few days once it had been created.
![]()
The real piece was on a much larger scale, this meant that a larger area had to be sprayed before the lace was removed, which also made it harder to definitely spray everywhere, and evenly. This caused a problem, towards the end of the first spray the first can began to run out. This meant that the end of the pattern was patchy. The only solution was to clean up this section and to do it again, carefully. This is because I wanted the pattern to match up. Another issue was with the cleaning up, this is because I had to brush away the powder. I had to brush the powder around before brushing it away from the space, and once all of this powder was away from the piece it had to be cleaned up as it can be very slippery. I had to be very careful not to clean off any of my work while making sure all the podwer was up.
![]()

I had to do some tests to find out what kind of "dust" I was going to use. I tested flour and baby powder, I found that as the baby powder was easier to spread and stuck better to the floor. I also noticed that the adheasive wasn't particularly resistant to brush strokes and this began to bring the pattern up when i was spreading the powder around. I resolved this by using a brush with more fine bristles, a make up brush worked well. I also noticed that the thicker the layer of spray adhesive meant that a thicker layer of powder stuck, which made the pattern easier to see. I made note of this so that i knew to get a good layer of adhesive down during the real piece. I also decided to test how the tests lasted when left over time, I left the test on the floor for a few days to see how it had faded. This showed that the pattern wouldn't fade over time which was good as it had to last a few days once it had been created.

The real piece was on a much larger scale, this meant that a larger area had to be sprayed before the lace was removed, which also made it harder to definitely spray everywhere, and evenly. This caused a problem, towards the end of the first spray the first can began to run out. This meant that the end of the pattern was patchy. The only solution was to clean up this section and to do it again, carefully. This is because I wanted the pattern to match up. Another issue was with the cleaning up, this is because I had to brush away the powder. I had to brush the powder around before brushing it away from the space, and once all of this powder was away from the piece it had to be cleaned up as it can be very slippery. I had to be very careful not to clean off any of my work while making sure all the podwer was up.

Cut Out Lace
I knew I wanted to have a physical dipiction of the 'dream energy' that flows around the room, I talked about this in my proposal as I thought this would be a good way of blurring the boundry between being asleep and being awake in the installation design.
My biggest influence to make these is Mia Pearlman's Cut Paper that represent clouds, the intricate design with pieces of paper twisted and intertwined shows a very complex and beautiful design which i thought could also represent the physical aspect of dreams well. I was also influenced by Tord Boontje, he worked with paper/plastic flower chains to design furniture, as he is a product designer. Although this was not the affect I was trying to achieve I liked the way the patterns in the chains showed detail in even the smallest section. This is what made me choose a lace pattern design, it allowed me to use chains of lace/paper to achieve what I wanted and give extra detail to really make the piece show the complexity of dreams within this physical representation. Another reason for my lace choice was because I had already used it on my quilt and this would help the room to flow better as the different designes would all match.
![]()
![]()
I began to look at two options for this wall piece, both of which were to do with lace patterns. My first idea was to cut out chains of the lace pattern and use many of these chains on the wall to create the effect. I tested this by placing sheets of black paper on the wall, cutting out a couple of chains from a lace curtain and sticking them up to see how this would look. The black paper was to make sure that the lace could be seen clearly against the wall during the tests, and could be seen in pictures more easily when doing test comparisons.
![]()
The other idea was to create a stencil for this lace pattern and create much longer chains by cutting out this design from paper, this idea origanated from my first project as I had done something similar wih repetitve map patterns. This of course was a little different as the patterns would be much thinner and more inticate, and there would be many long chains. To test this i used blue tak to temporerily stick up a chain to see how it would look, this pattern was more easily distinquishable from the wall so I did not use any black paper behind this chain.
![]()
After these tests, I decided that the paper lace chains were the better choice as they seemed to give a better representation of dreams. This is because the actual lace chains would not stay in the pattern shape as it is flexible whereas the paper patterns maintain there shape better. Also the lace cut outs were too small for a large scale design and took a much longer to cut out as it is a very long and difficault task to cut out each lace chain as they are very intricate.
I used long reels of paper that i folded back on itself before cutting patterns into it, this made the long chains of the repeating pattern. I began putting these up with double sided tape until it looked like the right position and then using pins once it did. After putting up a couple of these chains and becoming more confident about where to position them, I decided to put some in the air, hanging from invisible thread as i thought this would help to invole the whole room in the physical aspect of the dream. As I put up these chains I made sure they were twisted which helped give it all a different look, dispite being a repeat of one pattern. This twisting goes back to my influences from Mia Pearlman, as she has twisted paper which gave the effect I was trying to achieve. I also tried to spread out the chains starting from the bed, the start here is much thicker and has more chains and as it spreads out it becomes thinner like the dreams are flowing and spreading over the room as they help to blur the line between being asleep and being awake.
![]()
![]()
![]()
My biggest influence to make these is Mia Pearlman's Cut Paper that represent clouds, the intricate design with pieces of paper twisted and intertwined shows a very complex and beautiful design which i thought could also represent the physical aspect of dreams well. I was also influenced by Tord Boontje, he worked with paper/plastic flower chains to design furniture, as he is a product designer. Although this was not the affect I was trying to achieve I liked the way the patterns in the chains showed detail in even the smallest section. This is what made me choose a lace pattern design, it allowed me to use chains of lace/paper to achieve what I wanted and give extra detail to really make the piece show the complexity of dreams within this physical representation. Another reason for my lace choice was because I had already used it on my quilt and this would help the room to flow better as the different designes would all match.


I began to look at two options for this wall piece, both of which were to do with lace patterns. My first idea was to cut out chains of the lace pattern and use many of these chains on the wall to create the effect. I tested this by placing sheets of black paper on the wall, cutting out a couple of chains from a lace curtain and sticking them up to see how this would look. The black paper was to make sure that the lace could be seen clearly against the wall during the tests, and could be seen in pictures more easily when doing test comparisons.

The other idea was to create a stencil for this lace pattern and create much longer chains by cutting out this design from paper, this idea origanated from my first project as I had done something similar wih repetitve map patterns. This of course was a little different as the patterns would be much thinner and more inticate, and there would be many long chains. To test this i used blue tak to temporerily stick up a chain to see how it would look, this pattern was more easily distinquishable from the wall so I did not use any black paper behind this chain.

After these tests, I decided that the paper lace chains were the better choice as they seemed to give a better representation of dreams. This is because the actual lace chains would not stay in the pattern shape as it is flexible whereas the paper patterns maintain there shape better. Also the lace cut outs were too small for a large scale design and took a much longer to cut out as it is a very long and difficault task to cut out each lace chain as they are very intricate.
I used long reels of paper that i folded back on itself before cutting patterns into it, this made the long chains of the repeating pattern. I began putting these up with double sided tape until it looked like the right position and then using pins once it did. After putting up a couple of these chains and becoming more confident about where to position them, I decided to put some in the air, hanging from invisible thread as i thought this would help to invole the whole room in the physical aspect of the dream. As I put up these chains I made sure they were twisted which helped give it all a different look, dispite being a repeat of one pattern. This twisting goes back to my influences from Mia Pearlman, as she has twisted paper which gave the effect I was trying to achieve. I also tried to spread out the chains starting from the bed, the start here is much thicker and has more chains and as it spreads out it becomes thinner like the dreams are flowing and spreading over the room as they help to blur the line between being asleep and being awake.


Saturday, 18 June 2011
Making My Quilt of Dreams
Once I had stitched all the patches together into a block of patches, I started on the boarder. I placed the block of patches on the bed to work out how big I needed the boarder for it to fit on the bed. Once measured out I cut the out the big strips and pinned it around the block of patches making sure I folded the boarder diagonally to fit each together at the corners.
At this point it was considered there was something missing on the bottom row as there were painted patches all on the top three rows it seemed like our attention was drawn away from the bottom by these. To fix this I painted on the lace patch on the bottom (the one furthest away from the painted patch above) making painted patches on every row.
When the front was together I stitched a big piece of fabric for the back leaving a hole in the bottom unstitched for me to put the wadding inside. With the wadding inside I hand stitched the small gap up with loose stitches of white thread for it to be unseen.
![]()
Having the quilt all stitched together all I had left was additional stitching all over the quilt to finish it off; making it look padded in the stitched around areas. I used invisible thread to stitch around the patches so the stitches were unseen in order to seperate the patches from each other.
![]()
Before stitching text around the boarder I needed to test out the ideas I had for what to put around the boarder. So I took a picture of my quilt and printed off multiple copies to write on text to see what work best. I looked at using quotes of dreams, quotes from the existing dreams of my survey results and sleep related words.
words - I felt having just sleep related words was quite a typical thing to do and it's something I've seen done quite often. I would prefer a sentance more that a mess of words in random places.
big Quotes- These both have too many words that it would be impossible for me to able to fit it all on and get it finished in time.
Shakespear quotes - It was left to choose between these two shakespear quotes, and from re-reading them I chose the quote from Henry V as it talks about sleep in more depth than the other.
![]()
I drew onto the boarder lightly in pencil marking out the letters for me to stitch over with blue thread, this gave me a guide to follow to make sure that the lettering was spaced well and stayed in a straight line along the boarder. I used blue thread for the text because it creates a relaxed calm feeling, and as this colour is very nuetral it also does not show any bad dreams or negative feelings and helps to show the relaxed atmosphere the installation creates. Also the blue thread fitted in with the colours already used throughtout the quilt, keeping the quilt, and the installation within the same colour scheme, ensuring that it all flows into each other as dreams do.
Paint Problem
When I had painted on the quilt after the front was stitched together I accidentally got yellow oil paint on the white boarder. After failing to clean it off with turps and a cotton bud, I need to fix this by covering it with something. I tested covering it with white oil paint but it was still obvious that it had paint on so I added to it by gluing cut out lace over the painted sections. This worked well to hide the paint. For it not to look odd that there were a couple of lace in the corner I add more lace the diagonally opersite corner, framing the quilt with lace. I that by adding lace to the boarder has actually improved it by bringing out the patches even more that the patches weren't seperate to the boarder, bringing it all together.
![]()
![]()
![]()
At this point it was considered there was something missing on the bottom row as there were painted patches all on the top three rows it seemed like our attention was drawn away from the bottom by these. To fix this I painted on the lace patch on the bottom (the one furthest away from the painted patch above) making painted patches on every row.
When the front was together I stitched a big piece of fabric for the back leaving a hole in the bottom unstitched for me to put the wadding inside. With the wadding inside I hand stitched the small gap up with loose stitches of white thread for it to be unseen.

Having the quilt all stitched together all I had left was additional stitching all over the quilt to finish it off; making it look padded in the stitched around areas. I used invisible thread to stitch around the patches so the stitches were unseen in order to seperate the patches from each other.

Before stitching text around the boarder I needed to test out the ideas I had for what to put around the boarder. So I took a picture of my quilt and printed off multiple copies to write on text to see what work best. I looked at using quotes of dreams, quotes from the existing dreams of my survey results and sleep related words.
words - I felt having just sleep related words was quite a typical thing to do and it's something I've seen done quite often. I would prefer a sentance more that a mess of words in random places.
big Quotes- These both have too many words that it would be impossible for me to able to fit it all on and get it finished in time.
Shakespear quotes - It was left to choose between these two shakespear quotes, and from re-reading them I chose the quote from Henry V as it talks about sleep in more depth than the other.

I drew onto the boarder lightly in pencil marking out the letters for me to stitch over with blue thread, this gave me a guide to follow to make sure that the lettering was spaced well and stayed in a straight line along the boarder. I used blue thread for the text because it creates a relaxed calm feeling, and as this colour is very nuetral it also does not show any bad dreams or negative feelings and helps to show the relaxed atmosphere the installation creates. Also the blue thread fitted in with the colours already used throughtout the quilt, keeping the quilt, and the installation within the same colour scheme, ensuring that it all flows into each other as dreams do.
Paint Problem
When I had painted on the quilt after the front was stitched together I accidentally got yellow oil paint on the white boarder. After failing to clean it off with turps and a cotton bud, I need to fix this by covering it with something. I tested covering it with white oil paint but it was still obvious that it had paint on so I added to it by gluing cut out lace over the painted sections. This worked well to hide the paint. For it not to look odd that there were a couple of lace in the corner I add more lace the diagonally opersite corner, framing the quilt with lace. I that by adding lace to the boarder has actually improved it by bringing out the patches even more that the patches weren't seperate to the boarder, bringing it all together.


Friday, 17 June 2011
Film Music
Once I had finished editing my sequence together my last thing to do was to sort out and put together the music. I looked at each sequence individually to find the right music to set the mood i'm trying to achieve.
Doppelganger - When watching this i thought a minimalist style would help to show both the sureal theme that runs throughout the film and a sense of conflict between the personalities. The different layers of the music fade in as they begin to argue showing the rising tension.
Reverse - From watching this i thought it should be something very light hearted as the people walking around the table are creating an atmosphere that contrasts the serious nature of the central character. The music begins with a metronome as the other parts fades in over the top, this metronome creates a ticking sound like a clock going backwards, which coinsides with this reversed section. There is also a line within the track which i think fits well with this section "I'll always be by your side" which is ironic as he clearly has no idea of the people passing behind him.
Woods - I thought that this scene needed music that emphesised the distress and a sense that the character was lost. The music i chose helped to create this effect as it has a weird distant sound that also has an eerie feel to it.
Transitional - For these parts I wanted something quite heavy that will show the depth of the transitional pieces as there are many layers to each transition there is also more layers to the music. This also helps to seperate the different dream scenes, showing a change in the dream, like travelling into a new part of the "dream world".
After picking the appropriate songs i used garage band to edit these together to fit with the film. I uploaded the film onto garage band so that the music could be seen playing along side the film, making it easier to pinpoint where the music had to begin and finish. I had to cut down each song to ensure the correct part was with each section, and the length fitted the clip while allowing some extra so the music from each section could fade into each other.
Sunday, 12 June 2011
Adding the Bedding
I wanted to make the bed look used and give an impression of a restless sleep. First of all I knew i needed a matress, a sheet, a blanket and a pillow(s). It was unrealistic to get a matress into my installation, so i decided that an airbed would be a suitable replacement. I put the airbed on the bed frame and the sheet on the airbed. I then wanted to use the pillow, blanket and my quilt to make the bed look as though it had been slept in/was being slept in. To do this I looked over my images of people in bed to see what kind of shapes and positions the quilts and pillows were left in. This gave me some idea of how to make the bed look messy, I placed the pillow, blanket and quilt on the bed in the same way they were in some of the pictures. This helped to create the restless atmosphere I was after.
![]()

Friday, 10 June 2011
Starting to Make My Quilt
I measured out a quilt to be around 2m x 1m and the biggest I could get my sleeping pics on fabric is the size of an A3 piece of paper. This worked out that I could fit 12 patches in my quilt if I made the patches square.
After making the decision of using my developed sleeping images for patches on my quilt, I needed to pick what patch technique I'd like in my quilt. My patches looked good together but it would be better to have only 3 or 4 styles and make a few with different sleeping pictures in these style shows a links all over the quilt instead of it being too overwhelming. My favorite as well as most people's opinion was the image with the lace sewn on. Having this idea to start with let me pick and choose others that would work well with it with similar trates but also use different mediums like stitched pieces. I chose one where I stitched in drawing the pattern of the lace and the one where I stitched circular around and image of someone. I also wanted to have painted patches within my quilt aswell to highlight the sleeping image aswell as trying to show dreams coming out from people in the images.
![]()
![]()
![]()
![]()
For each technique I needed specifically set images like for my circular stitches patches I needed pictures of people from above. The painted patches needed close up images, the stitched lace would need space above the people in the image and the lace patches needed the people to be in the middle with space around for lace.
When making the patches I was able to change things about the patches. i used a cream thread of the stitched lace drawing as its a similar to the colour of lace but also stood out from the white backgrounds. i wanted to use pale colours for the circular stitched and the white wasn't very noticable and the darker tones were too harsh as the paler colour for the calmness of sleeping. I didn't stitch in small flowers and leaves into the lace patches as from the distance people wouldn't notice them very much.
![]()
After making the patches I played around with the positioning of the patches, I attempted to go for a diagonal pattern for each patch type. I also kept the two lace type patches seperate because they are too similar. Meaning the rows between two lace images were for the painted and circular stitch patches. I put the painted patches quite central as these were quite bright in comparison to the others, especially the patch of the blonde haired person.
After making the decision of using my developed sleeping images for patches on my quilt, I needed to pick what patch technique I'd like in my quilt. My patches looked good together but it would be better to have only 3 or 4 styles and make a few with different sleeping pictures in these style shows a links all over the quilt instead of it being too overwhelming. My favorite as well as most people's opinion was the image with the lace sewn on. Having this idea to start with let me pick and choose others that would work well with it with similar trates but also use different mediums like stitched pieces. I chose one where I stitched in drawing the pattern of the lace and the one where I stitched circular around and image of someone. I also wanted to have painted patches within my quilt aswell to highlight the sleeping image aswell as trying to show dreams coming out from people in the images.


For each technique I needed specifically set images like for my circular stitches patches I needed pictures of people from above. The painted patches needed close up images, the stitched lace would need space above the people in the image and the lace patches needed the people to be in the middle with space around for lace.
When making the patches I was able to change things about the patches. i used a cream thread of the stitched lace drawing as its a similar to the colour of lace but also stood out from the white backgrounds. i wanted to use pale colours for the circular stitched and the white wasn't very noticable and the darker tones were too harsh as the paler colour for the calmness of sleeping. I didn't stitch in small flowers and leaves into the lace patches as from the distance people wouldn't notice them very much.

After making the patches I played around with the positioning of the patches, I attempted to go for a diagonal pattern for each patch type. I also kept the two lace type patches seperate because they are too similar. Meaning the rows between two lace images were for the painted and circular stitch patches. I put the painted patches quite central as these were quite bright in comparison to the others, especially the patch of the blonde haired person.
Tuesday, 7 June 2011
Film Editing
After filming the footage for my four dream sequence I began to edit each individually.
Doppelgangers
![]() I started editing this sequence firstly by putting the two film sequences together. I cropped the the left and right sides accordingly to each half and when placed on top of each other they lined up almost perfectly because I kept the camera in the same place for each filming process. There was a slight line down the middle but this is barely noticeable and sure won't be when viewed on the small and old TV in my installation. I had problems when matching up the two sides with their interactions because one side was talking a lot faster than the other. This was because when filming we tried matching it up with another person repeating the lines, looking back now I should have recorded the sound of the first side of the lines while filming and played it back to match up perfectly with the second side's lines. To fix this I had to cut sections of film and speed up the long gaps within the right side's lines to start talking straight after the left side had finished. When I edited this sequence I decided to keep out the part where the person on the right would enter the room, as we get that they have came in when they enter the shot, also this was hard to get the left person to watch the right person sit down, which was difficult to express without the other person actually being there. Once the two sides were perfectly lined up with interaction I needed to figure out what to do with sound of them talking, I could either keep the sound or add subtitles. Keeping the sound would interrupt with the music chosen for this sequence. when I chose to add subtitles i found that the words below were distracting people from viewing the sequence and by this I realized that what they were saying is irrelevant but instead that there are two of the same people in one shot which is important, so to fix this I changed the scrip into French and added these for subtitles as this also shows they are interacting and that i haven't forgot that but keeping main interest on the two people.
I started editing this sequence firstly by putting the two film sequences together. I cropped the the left and right sides accordingly to each half and when placed on top of each other they lined up almost perfectly because I kept the camera in the same place for each filming process. There was a slight line down the middle but this is barely noticeable and sure won't be when viewed on the small and old TV in my installation. I had problems when matching up the two sides with their interactions because one side was talking a lot faster than the other. This was because when filming we tried matching it up with another person repeating the lines, looking back now I should have recorded the sound of the first side of the lines while filming and played it back to match up perfectly with the second side's lines. To fix this I had to cut sections of film and speed up the long gaps within the right side's lines to start talking straight after the left side had finished. When I edited this sequence I decided to keep out the part where the person on the right would enter the room, as we get that they have came in when they enter the shot, also this was hard to get the left person to watch the right person sit down, which was difficult to express without the other person actually being there. Once the two sides were perfectly lined up with interaction I needed to figure out what to do with sound of them talking, I could either keep the sound or add subtitles. Keeping the sound would interrupt with the music chosen for this sequence. when I chose to add subtitles i found that the words below were distracting people from viewing the sequence and by this I realized that what they were saying is irrelevant but instead that there are two of the same people in one shot which is important, so to fix this I changed the scrip into French and added these for subtitles as this also shows they are interacting and that i haven't forgot that but keeping main interest on the two people.
Reversed Chronology
![]() When I tried to put the footage onto final cut pro there was a fault with it, it didn't up load the end part where people threw balloons and confetti. After re-uploading and starting new projects on final cut that final part would still not come up to edit, luckily I was still able to use the rest of the footage. I reversed what I had that still worked perfectly well for the intentions of this sequence. when looking through the sequence there were very obvious gaps where people there wasn't anyone walking behind the center figure, so i cut the film during these parts and speed them up, making them shorter for the next group of people to come in shot.
When I tried to put the footage onto final cut pro there was a fault with it, it didn't up load the end part where people threw balloons and confetti. After re-uploading and starting new projects on final cut that final part would still not come up to edit, luckily I was still able to use the rest of the footage. I reversed what I had that still worked perfectly well for the intentions of this sequence. when looking through the sequence there were very obvious gaps where people there wasn't anyone walking behind the center figure, so i cut the film during these parts and speed them up, making them shorter for the next group of people to come in shot.
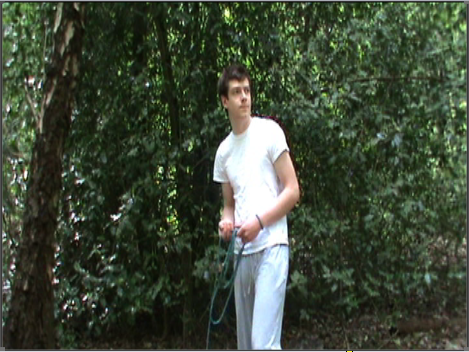
Woods Trail
![]() Because I story boarded precisely what I wanted I found filming and editing this sequence a lot easier and i was able to film it all in one go without having to go backwards and forwards between filming and editing. I knew from my storyboard how i was telling the story so this didn't take very long for me to cut the sections of film and keeping them together. During filming I filmed a few parts that weren't story boarded. I filmed a close up of my main character picking up the wool he is following and I also filmed upwards towards the trees above while walking around. This really gives a sense of time passing as we have moved away from the main character while also showing that there is still movement.
Because I story boarded precisely what I wanted I found filming and editing this sequence a lot easier and i was able to film it all in one go without having to go backwards and forwards between filming and editing. I knew from my storyboard how i was telling the story so this didn't take very long for me to cut the sections of film and keeping them together. During filming I filmed a few parts that weren't story boarded. I filmed a close up of my main character picking up the wool he is following and I also filmed upwards towards the trees above while walking around. This really gives a sense of time passing as we have moved away from the main character while also showing that there is still movement.
Backwards Smoking
When i came back to the footage I had for my back wards smoking sequence I found that through out the footage the smoke didn't show up at all, making this footage useless for my dream sequence. it was concluded that it could have been that it was too dark for it to be capture on film and that if i were to film it again it could work if I were to have better lighting but we we're still uncertain this would work.I could either take this sequence idea out of my film or try to film it better. If I were to have more time to text this and film it again i would but with all my other sequences it didn't seem required as i probably have enough footage of surreal dreams with just my other 3 sequences.
Transitional Dreams
![]() Using the three types of footage of projected marked and painted film, Ink mixing in water and ink dripping down a plane of glass. I layered these and changed the opacity by using the "Overlay" function on final cut pro. I tried to use footage for the three types of footage that doesn't have the same colours so we'd be able to see each layer. I used the footage of dripped ink with only one colour as with all the other footage I didn't want too many of the same colours flowing at once as you wont see the the different parts separately as the painted film footage is moving really fast.
Using the three types of footage of projected marked and painted film, Ink mixing in water and ink dripping down a plane of glass. I layered these and changed the opacity by using the "Overlay" function on final cut pro. I tried to use footage for the three types of footage that doesn't have the same colours so we'd be able to see each layer. I used the footage of dripped ink with only one colour as with all the other footage I didn't want too many of the same colours flowing at once as you wont see the the different parts separately as the painted film footage is moving really fast.
Transitional Problem
Once I had edited all the seperate dream footage and I needed to merge each sequence together with transitions. I wanted a transition that goes from one image of footage and fades directly into the already playing next footage. I thought this transition would be best for my film as with dreams they dont stop and start they flow continuously overlaping and having no direct link as it's all a random stream of things happening.
When I tried adding a transition but when I dragged the transition over to the footage it didn't add to the sequence. After playing around with the settings and failing, it was concluded that this was probably happening because of there being so many layers of footage and so much different editing occuring at once in one project. To fix this I exported the current footage that merged all the layers together into just one strip of film when I imported into a new project.
I used the cross dissolve transition but for this to work I had to split the footage into two layers for where the footage would switch layer each time for a transition because I need the next lot of footage to have started playing before the first lot of footage would fade out and finish.
![]()
Doppelgangers


Woods Trail
Backwards Smoking
When i came back to the footage I had for my back wards smoking sequence I found that through out the footage the smoke didn't show up at all, making this footage useless for my dream sequence. it was concluded that it could have been that it was too dark for it to be capture on film and that if i were to film it again it could work if I were to have better lighting but we we're still uncertain this would work.I could either take this sequence idea out of my film or try to film it better. If I were to have more time to text this and film it again i would but with all my other sequences it didn't seem required as i probably have enough footage of surreal dreams with just my other 3 sequences.
Transitional Dreams

Transitional Problem
Once I had edited all the seperate dream footage and I needed to merge each sequence together with transitions. I wanted a transition that goes from one image of footage and fades directly into the already playing next footage. I thought this transition would be best for my film as with dreams they dont stop and start they flow continuously overlaping and having no direct link as it's all a random stream of things happening.
When I tried adding a transition but when I dragged the transition over to the footage it didn't add to the sequence. After playing around with the settings and failing, it was concluded that this was probably happening because of there being so many layers of footage and so much different editing occuring at once in one project. To fix this I exported the current footage that merged all the layers together into just one strip of film when I imported into a new project.
I used the cross dissolve transition but for this to work I had to split the footage into two layers for where the footage would switch layer each time for a transition because I need the next lot of footage to have started playing before the first lot of footage would fade out and finish.

Subscribe to:
Posts (Atom)