

Wednesday, 30 January 2013
Plan for Quilt
After sampling all my elements I have finally come to the point where I need to be making decisions for what it is going to look like. Playing with some different combinations I have been able to look at what possibilities I have. I've already chosen to have a top layer of quilt to be mixed coloured with a yellow print so I was looking for my text layer to go with that. I come to the conclusion to have a yellow background to match the print on the top layer and two prints of text in brown, keeping to my colour scheme. Also the black was too bold. I will be adding scrim in places in my quilt as well adding an extra layers to the quilt.

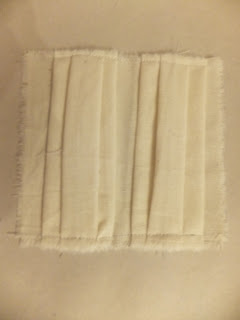
Torn Samples of Top Layer
Before I choose what print I'd like for my top layer I need to test my favorites to see how they both look once they've gone through the process of tearing into them. They can look really nice before but then look terrible after I've torn them. I tried a yellow print, flock and clear foil on the mixed coloured background. I found that the tearing ruined the flock and clear not making them look as nice as before, making the yellow print my favorite.


Text Print Tests
Today I played with my text screen looking again at different colour combinations and different amounts of layers of print on different coloured fabrics. I had a huge range of samples but I think I like having more than one print of text as It looks really boring with just the one print.


Tuesday, 29 January 2013
Fabric Leaves
After exposing my screen I began dyeing some fabric the make into stitched leaves in case I wanted them in the layers. Later after making seven leaves out of some scrap cotton I realized that I didn't want to use them within the layers, thinking it would be too much. Instead I decided to make a sample out of them for one of my other quilt ideas by stitching together loads and loads of these leaves.


Exposed Text Screen
I had a few ideas for what to have for my text. I looked at lulabys, sleep quotes, sayings of sweet dreams, night time stories and songs about sleeping. I picked out a few I liked and through the process of elimination I chose to use the story of Goodnight Moon. This story is popular for bedtime stories and the words describe in rhyme saying goodnight to everything.
With my text chosen I wanted it to be hand written like in the armour, so I wrote out the text, played with what size I'd want it and exposed the screen I kept it at A4 size as I thought anything bigger wont make much sense through the holes in the torn top layer, as I want a glimpse of a couple of words whicH I'd only get by keeping it A4.
With my text chosen I wanted it to be hand written like in the armour, so I wrote out the text, played with what size I'd want it and exposed the screen I kept it at A4 size as I thought anything bigger wont make much sense through the holes in the torn top layer, as I want a glimpse of a couple of words whicH I'd only get by keeping it A4.
Monday, 28 January 2013
Torn Layered Test
After my tutorial with Claire I had sketched out the ideas we had discussed. Just so I don't forget all the details I cleared up and don't go into a panic again.
I visited the textiles workshop with my little doodle but before I could just jump into making I had to sample my ideas of the different layers in order to see if it would look right in a combination. I was also unsure whether to tear the top layer first and then to stitch it or to stitch the layers together and then tear away at the top. I tested both processes with my layers and I found that it was best to tear the top layer first before stitching together as the scrim is still intact whereas the other process destroyed the scrim and you couldn't see it at all.


I visited the textiles workshop with my little doodle but before I could just jump into making I had to sample my ideas of the different layers in order to see if it would look right in a combination. I was also unsure whether to tear the top layer first and then to stitch it or to stitch the layers together and then tear away at the top. I tested both processes with my layers and I found that it was best to tear the top layer first before stitching together as the scrim is still intact whereas the other process destroyed the scrim and you couldn't see it at all.


Tutorial: Claire
With only a week left til my deadline I wasn't sure what I was going to put together for my final piece. I had all these ideas and no way to form them into a piece. Panicking and stressed I had to get a tutorial to get me on the right tracks. With Claire I was able to lay all my ideas out and discuss all the things I was unsure about to come to a conclusion of where my next steps were to my finished piece. I talked about:
the prints I already had and how to do my top layer as I liked my prints so much I didn't know whether I wanted to destroy them
the text layer that I had no idea what I would want as the text in my quilt. I wanted to have something with the theme of protection which was what the writing in the samurai armour was for, protection from harm. I realised that the armour was for protection from harm so if a quilt is used for sleeping then it should have text inside about protection in sleep. lulabys and wishes of good night are the general idea.
The addition of other things in the layers. I was thinking about what to do with my stitched fabric leaves and whether I could put them within the layers if i think they would look alright or I have time to make them. Clair also picked up on a material I had used in a drawing, which was cotton scrim and that It might look good amoungst the layers.
Having segments in the quilt. Before I wasn't sure how to show the segments with my idea and the just the stiching would make the segments but I thought that if I have the top layer in patches that would also show my key word of segments better than just the stitching.
With most of my quereies and panic worked out I felt more at ease and on the path to reaching my target on monday.
Saturday, 26 January 2013
Hand Tie Quilting samples
Another quilting type, Hand Tied Quilting, that I can do at home as you pull threads through the fabric layers and tie them tight. I tried three different types of threads with different thicknesses to show the differences. I used cotton sewing thread, embroidery thread and yarn. I looked at a few different types mostly involving a bit of embroidery to stitch the layers together.


Friday, 25 January 2013
Types of Quiltiing Samples
My last day in the workshop before my 3DSP deadline and I was in the textile workshop sampling the different types of quilt that I have been meaning to do for weeks now. I thought it was to be an important range of samples for my quilting section of 3DSP. I tried Channel, Stitch-in-Ditch, Motif and free-hand quilting to show a range and understanding of the different types available.


Thursday, 24 January 2013
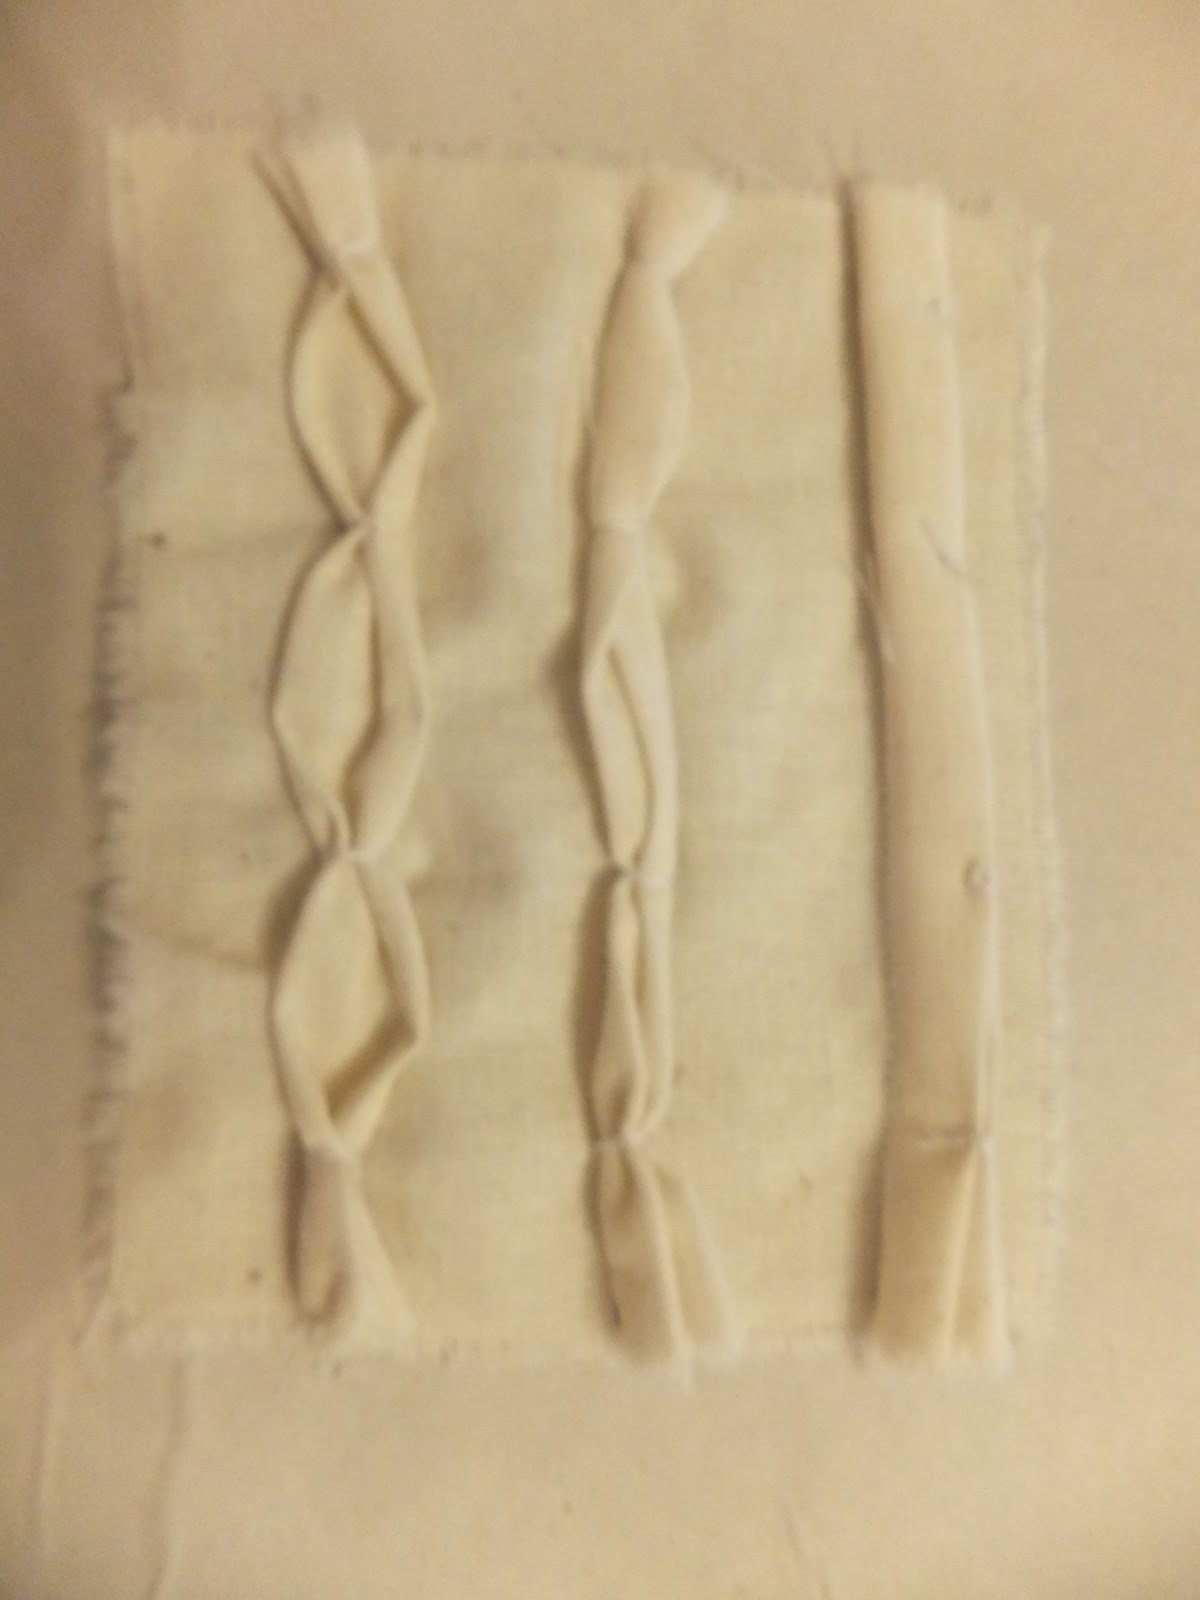
3DSP Samples Fabric Manipulation
My last chance to finish off my fabric manipulation samples in late night with Rich. I finished off a couple of tucks (Contoured and Slashed) that I didn't have time for Monday. In addition to this I also created some other folded fabric textures: Interlocked Square, Prairie Points and Bias Strip Boarders. I tried a few different types of Bias strips looking at different sizes and ways to use them.


Wednesday, 23 January 2013
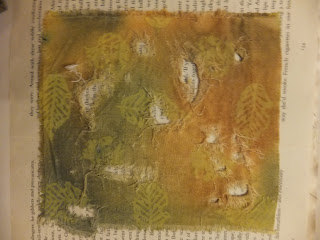
Leaf Print Samples
I got to test out my screen with the leaf design. i wanted to test out a combination of different colours on different dyed cotton. From these tests I can pick out which type of print I'd like for the top layer of my quilt. Out of my prints my favorites three were yellow, dyed flock and clear foil on the mixed dyed fabric. I want to test these three with wear and tear and see how they look after that process to decide which I think is best.


Monday, 21 January 2013
3DSP - Tuck Samples
With the textiles workshop being closed all day I've borrowed a sewing machine and taken it into the metals workshop with rich. I have been focusing on churning out fabric manipulation samples. Carrying on from tucks I've been researching the many different types of tucks and have put that into practice by creating a whole range for my 3DSP. In this time I looked at Pin, blind, centered, double centered, tapered, Shell, Cross-Stitched and Cross-tacked tucks. I managed to make a big impact into my samples collection today making around 7/8 samples. I basically aimed to cover all the areas of tucks before moving on, attempting to cover the grounds as its getting close to the deadline soon.


3DSP Tutorial
To start this week I had a tutorial with James for 3DSP. We basically discussed what I have and whether I was ready for the deadline Samples fine. My biggest issue is how I was to present my samples as I know that I wanted to have books as the idea was that they are for referring to. But I didn't want to just have images of my samples as with textiles I like to look at the quality of it in person and you can loose some of the details in an image. James suggested that I need to find a way of binding these samples together, something like a big clip or something. As soon as he said it I realized that I will use binding rings to hold them all together and for my chunky quilted samples I'll sew hooks on to bind them with the rings.
Friday, 18 January 2013
Quilt Ideas
After screen printing it's really allowed me to think about what ideas I might have for what I want for my finished piece. At first I wanted a big quilt, then it changed to three mini quilts and then just one mini quilt. But now after considerations of all my ideas I think I return to the idea of three as I have too many ideas for just one mini quilt that I believe it's going to look over crowded. So to separate my ideas into 3 quilt pieces might work out better. My ideas for the three quilts are:
For this to work it's going to be a lot of work to organize all the together. It may happen that I only make one of the quilts.
- A torn quilt with layers of my screen printed design
- A quilt with a laser cut of my leaf pattern on the first layer revealing text or screen print design
- A formation of my fabric leaves in a quilt
For this to work it's going to be a lot of work to organize all the together. It may happen that I only make one of the quilts.
Fabric Dyeing & Screen Printing
I've been producing some screen printed samples to test out the best use of my print design. As my Idea for my quilt is to print onto a dyed fabric of my natural colour themes I started with dying some fabric in preparation. I also dyed some plain colours to test for subtle printing. I mixed up some paint for the green and brown and printed on the same plain coloured fabrics and I really like the subtle addition the prints give rather than something incredibly bold. I also did a streaky print of green and brown on a light green dyed fabric, where I splatted brown on the screen with a normal print of green giving it a subtle hint of colour change in the print. I really like this and want to try it with the yellow i want to mix up and on the multicoloured fabric.
Thursday, 17 January 2013
3DSP - Fabric Manipulation - Tucks
Today was a 3DSP day. This day I worked solidly on making samples. I've kinda lost my way with my quilting samples as I'm struggling for ideas but I have moved on to fabric manipulation for the mean time. I went through the Creative Tucks and Textures for Quilts and Embroidery book I got from the library which is so much easier to understand than the Fabric Manipulation book as it explains it better and has better diagrams. I started simply with basic tucks and played with the twisting of tucks to make interesting three-dimensional shapes with them. After that I then learnt about crossed over tucks and played with changes of them. And finally I created a few samples of fabric additions you can add to pieces give variations and decoration. I made 15 samples today, I'm so proud of the amount of impact that has added to my 3DSP samples.


Wednesday, 16 January 2013
Processed Screen & Size Ratio
Before I expose my screen I needed to consider the size of my design as I really need it to be the right size ratio otherwise it's going to look too blocky of an image or too tiny to notice. After playing on the photocopier I returned with a whole range of different sizes and picked a reasonable size being 65% of the original, making it smaller as my idea is that the print isn't the main focus but it's a nice element. With my design and size chosen I coated my screen and exposed it ready to start printing.


Bloom Research
Spent my morning in the library this morning looking through all the Bloom Magazines for some research for my sketchbook. I'm possibly in love with these magazines. I wish I could afford these magazines as they have the most beautiful images. I think for my next project i'm going to start my research here.


Tuesday, 15 January 2013
Screen Print Design
I managed to prepare a design for screen printing using two images of leaves that I drew from my dysperse dye prints. I tampered with the images to make them more cleaner and smoother and arranged them in a repetitive print. When choosing the formation for the repetative print I wanted it to be a little bit random but It's hard to have a scattered effect and for it to not look rubbish but also it's tricky to have it repeated well with multiple sections. So I've managed to arrange an organised speratic effect where nothing in the repeated square is the same direction or angle. I'm so happy with this design. I think it's going to work well in my finished quilt with all my other ideas.
Workshop: Laser Cutting
I didn't think I was going to be too impressed by the laser cutter but actually it is so amazing. I really want to have a paper project so I can just use it over and over and over cutting out my drawings and designs. I spent an hour putting together a basic sheet to show some of the cutting and etching processes and finishing with a small design for my Design Development. My only thought now is to how I can use this in textiles.

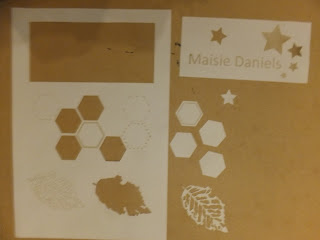

I made these simple start off cuttings from the laser cutting to see the wide range of cuts and etches it can do.

Monday, 14 January 2013
Tutorial: Kate
Had my first tutorial of the year today with Kate. It was really good as it gave me a the motivation I needed to kick start my work. We recapped what we last talked about and where I was helping me to see what I had to do next as I lost sight of it over the Christmas break. I need to recap the work I've already done and start looking forward.
Sunday, 13 January 2013
Sketchbook Binding
I've been rethinking the way I'm going to work my sketchbook. I was going to stab bind the sheets together at the end but I've found from using this binding technique that the book doesn't really open up very well and you have to force the pages to open up. What I'd like for my sketchbook I'd for it to be opened up and laid out flat, which is why I was fond of using ring bound sketchbooks. After thinking about it I've decided I'm going buy rings and use them to bind the pages.
Thursday, 10 January 2013
Gravity - Simone Ten Homple
Today was gravity day and we were visited by metal worker Simone Ten Homple. Simone's specifically works to make utensils like vessel and spoons. Simone's work doesn't particularly appeal to me and my craft but what I did pick up from the lecture was that it's important to learn by the process of asking questions and finding out whether it works or not, otherwise we'd never know. Simone is a strong believer of this and carries this out within her own work. What I also liked about her work is that during her process of making her utensils she will look at the design of the it and pick out the main elements and play with that to redesign it. She made a teapot without a handle and surrounded the hole where the water goes in with stone to be able to pick it up. I'm also quite fond of how she will make multiples of things and having them together as a collection with each piece being something different to the next.


Subscribe to:
Posts (Atom)